Showing posts with label Jelly Sammich. Show all posts

Monday, January 13, 2014

A Fantastic Find from Five Below!

Hi lovelies!! I hope your Monday afternoon is going well. Its cold and windy here in New York, but at least its not bitterly cold.

I also ordered a couple text books for school today, I cannot believe school starts in a week as of tomorrow! This vacation has gone way too quickly!

Today's polish is a fun one! Back over the fall I took a trip to Five Below. If you haven't been to a Five Below or never heard of it,  it is a store that sells all kinds of products from beauty products to phone cases and even clothing! Plus everything is $5 or less!

In the beauty section a lot of the time Five Below has a deal on nail polish where you get three polishes for $5! Not a bad deal at all!

Only one polish caught my eye, and it is called Jawbreaker! It is a white milky crelly polish that is chalk full of different colored glitter!


This polish reminds me a lot of KB Shimmer 'Oh Splat'. I don't own that amazing polish however but one day I plan to own lots of indie polishes. I just need to get my tax refund first!

There is quite a lot of violet and blue glitter in this polish and occasionally you get bright red hex  glitter like on my ring finger and a bright yellow hex glitter that is also on my ring finger.


From looking at the bottle you can see all the colors of glitter mixed in. There is even teal in there! It took about three coats to get this polish to how I like a jelly sandwich to look. 

The drying time is about average for this polish and it dries smooth too boot! I didn't see any glitter bits sticking up and poking me as I wore this polish over the last four days or so. Once it did start chipping though is when I would get it caught in my hair, and at that point it just all peeled off in sheets anyway.

But considering the job I have where I am constantly using my fingers and banging them against a keyboard I can't say I don't blame the polish for chipping.

I really love this polish overall and would most certainly wear it over and over again because each time you don't know what array of glitter you will get!

Until tomorrow!
<3 Nicole.

Thursday, September 13, 2012

Red Cheetah Nails. Rawr!

Hello! Happy Thursday!

Today's post is inspired by the concept of the Jelly Sandwich. I've explained what a Jelly Sandwich many times here on the blog, take a look at this post here if your not sure!

Taking the concept of the jelly sandwich I decided to try encapsulating a stamp instead! Same general idea just using a stamp in place of what would be glitter. It also makes me think of the amazing nail polish jewelry out there in the world!

Starting off I used one coat of Sinful Colors Ruby Ruby, a brilliant red jelly polish that is readily available in drugstores and now even Walmart, that's where I got mine from! Of course you do need to start off with a base coat before your polish so you can protect your nails. I recently purchased Orly Bonder about a month ago and have been using it in every manicure I do and it is wonderful! The coolest thing though is I've even gotten my mom to start using it, and now that she is retired (what a lucky duck) she is testing the waters on different color polishes too!

Bonder is a rubberizing base coat, at least that's what its described as being on the bottle, it dries super quick and definitely makes the polish smooth and stay on longer ( not that I keep my manicures on for longer than 3 days anyway).

OK so back to the manicure. Once the first coat of Ruby Ruby is dry, I took Wet 'n' Wild Black creme, my holy grail black polish for stamping, and stamped the cheetah/leopard print from the Salon Express Kit. Normally at this stage you would be done, add a top coat and bam, but no I went and added another thin layer of Ruby Ruby once the stamp was dry. It does dull the stamped design just a little but that's okay its what we want, the black creme is still very much see-able but it looks like its encased in the nail!

I tried this with a few other color stamps and white actually would of looked really cool, it gave a very subtle effect but not what I wanted. Once your top layer is dry add you top coat and you are done!

Take a look at the pictures if my long winded response confuses you!


Okay so I hope you liked this post! Stay tuned for more soon!

Nicole  

Saturday, August 11, 2012

Glitter Jelly Sandwich time! Glitter Jelly Sandwich time..

Like the title? Yeah me trying to be clever....Anywho, Hello!!!

Hope you all are having a good Saturday, its still raining here in good ole New York. Lucky me had to walk through a tremendous downpour just to get from my car to my front door... which has no awning or gutters so its like walking through a waterfall. Needless to say I got an unneeded second shower today!

Today I bring you another bright happy manicure. A jelly sandwich! Jelly sandwiches are so easy to do! You take a jelly polish, put on one to two layers of it, let it dry, add one coat of your favorite multi colored glitter polish or just some sort of glitter polish in general and then add one more thin coat of your jelly polish and TA DA you have a jelly sandwich.

Now you could save your self some time and buy the polishes that already have all the ingredients together and all you have to do is apply two to three coats of it. I personally wish I had more of those types. I don't own many jelly polishes myself in fact I think I only own one or two. Oh and if your curious as to what a jelly polish is, it is a polish that you can still see through/ or  see your visible nail line even after three coats.

Today's jelly sandwich consist of two coats of Sinful Colors Scandal. Now I bought Scandal way before all the Sinful Colors Hullabaloo. Now while I don't support what they did in any sense, it was just down right wrong, I'm still going to use the polishes I have... Since I'm on that no buy....

After I applied Scandal's first two coats and let dry, I then applied one coat of Confetti Polish in Tasmanian Devil. This polish is a good dupe for all those other rainbow glitter polishes out there and its fairly cheap too. I got mine from CVS but I don't remember how much it was, check with your local retailer to get the exact price for your area.

Once Tasmanian Devil was dry I applied one more thin coat over top to give the 'suspended' look. If I may say that it came out nicely.

 This first picture was taken with the flash on my camera, it only happened because the sun that peeked out right when I was ready to take pictures dashed away behind the clouds. :(

This is by far my favorite picture of the three in this post. It's in the natural cloudy light and it definitely shows the glitter suspended in the polish well. Plus the glitter is nicely defined in this picture too, you can see some of the individual colors.


Lastly this picture was taken under artificial light, a huge thanks to the overhead light of the stove for participating!

Okay so I hope you enjoyed this post and I believe by Monday this mani will be history, I'm assuming its going to peel off just like my last two did... grr.. don't even get me started on it. But by Monday I think the next sprinkles polish is in line to be posted!

Talk to you all then!
Nicole

Monday, May 14, 2012

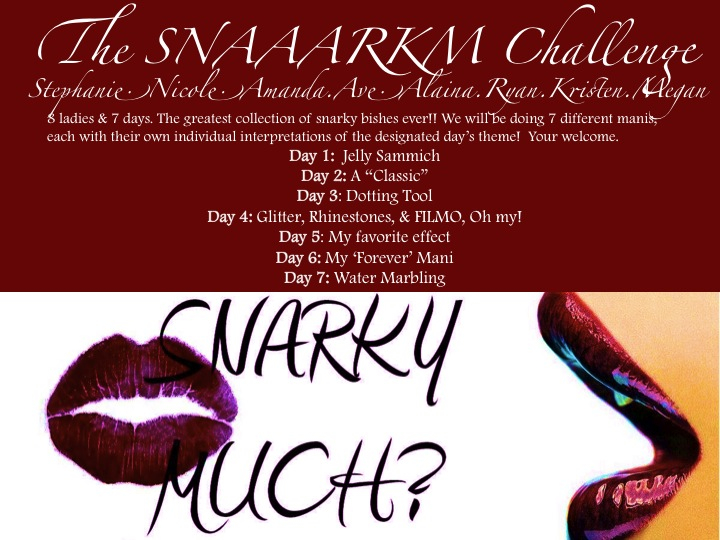
Let the 7 Day Challenge Begin! Day One: Jelly Sammich!

Hello!

Today I bring you the start of the 7 Day Challenge!


So this challenge consist of 8 lovely ladies and 7 days of challenges ranging from today's challenge of Jelly Sammich to Water Marbling! As it goes we shall be posting every other day and at 6p.m. Since most of us are on EST that's how we came up with the time.

So on to today's challenge. Jelly Sammich. A jelly sammich consist of using a nail polish that is sheer and has a jelly like finish that you can layer glitter in between coats of polish. In this challenge each lady will be able to interpret the challenge in there own way!

Here is my take on the Jelly Sammich. Since none of my polishes have that jelly like finish except for one and I didn't care for it much I found some sheer creme polishes that did the job just fine. To help me out it did put down a layer of white first and then a coat of color to help combat streaky-ness. Streaky polish is my enemy!

I used Simply Sweet Polish in baby pink which I bought at Marshall's before Easter. Then layered one coat of Spoiled Trust Fund Baby. Trust Fund Baby has gold, blue, magenta and black square and round glitter and is perfect for sammiches.


As you can see I missed a small spot on my middle finger. :( oh well. now that I'm down to three nubs I tried to shorten all as best I could except for my pinkies there the only finger nail that grows fast and strong.

I think I will wear this manicure more often with a different color. This makes me want cupcakes with pink frosting and sprinkles now. Also I must go hunt down some jelly polishes as well too.

I hoped you like this post and if you did go and visit the 7 other fabulous ladies who are doing this challenge.

Alaina - The Little Canvas
Stephanie - Sincerely Stephanie
Ryan - Dream A Little Dream Of Polish
Ave- Polish Pixelle
Amanda- Fashion Footing
Kristen- In The Name Of Polish
Megan- Let There Be Lacquer.


Until then.
Nicole.