Showing posts with label Wet n' Wild. Show all posts

Wednesday, February 20, 2013

Hello!!! How 'bout some stampin'?

Good evening! It has been a week since my last post! How naughty of me! I've been desperately trying to keep on a every other day schedule and god life keeps getting in the way!

Anyway how was your Valentines? Mine was ok no flowers or candy but I  did my taxes, and  getting a decent refund so life is good! I just wish the money would get here!

In other news I am going to Florida in June! I am so pumped to get out of New York for almost two weeks! I will have pre published post for the time that I'm away and I plan on upping my Internet plan on my phone so I can stay in contact on Twitter and such.

Today I bring you the manicure I wore on Valentines Day. Or we'll a variation of it. On valentines day I actually wore China Glaze Cranberry Splash and Bundle Monster Plate 311. For the  base color in the photos below I used one of Julie G's new polishes that are available at Rite Aid right now!

The name of this beauty is called YOU-niverse ! When I saw it I wanted it immediately due to the amazing duo chrome in the bottle! The duo chrome does show up on the nail but it is super hard to photograph. It's more muffled on the nail then when concentrated in the bottle but still pretty none the less. I don't tend to gravitate towards bronze-y polishes like this one but it suits my skin tone nicely.

Two to three coats of YOUniverse is all you need to get the polish opaque. I got quite a few compliments on this color so you should too!

I figure this was a manicure that if your not a fan of all the fancy pinks and reds and whites on Valentines day this was a way to be that little something different.

For the stamp itself I used my Wet 'n' Wild, Black crème,  I bought back ups of this polish only to see that they are thinner then I thought, but I guess I'll have to let them sit out to get a little thicker.

So on to the photos:

These are taken with three coats of YOUniverse, and top coat in natural light.


All in all I think this is a nice departure from all the other stamping manicures I've tried out. I never thought that it would look this cool! I hope you guys go out and grab a bottle of YOUniverse at Rite Aid and maybe if you want to get into stamping some Bundle Monster Plates!

Have a great night!
<3 Nicole!

Friday, October 26, 2012

Halloween Nail Art! Spooky Googley Eyes!

Happy Friday! Hope you all are well today!

In this blog post I am going to give you step by step instructions on how to get these nails!


Spooky googley eyes, we always see them around this time of year, whether it be as awesome Halloween decorations in lights or on pumpkins, or even in the dark of the night when you see that pair of creepy eyes staring at you in the dark.

I have seen a few people on instagram do these types of nails mixed with other nail art, and I wanted to take a stab at it!

I have not been able to stop looking at my nails since I did this nail art! They remind me of these light that my aunt ( god rest her soul)  used to put in her trees at Halloween time. I remember helping her put them in the bushes and trees. I always loved decorating her house for Halloween, she had one of those big houses that you could go all out and do elaborate scenes with. She did this especially at Christmas time!

I debated on doing different color eyes, like red, pink, bright green, or neon yellow, but kept it original just using white. I did dab over the white with glow in the dark polish but I guess I didn't use enough because my eyes don't glow :(


Here is how to get these nifty nails!
 
Step 1: Apply base coat and let dry.
 
Step 2: Apply two coats of your favorite black polish. Mine is Wet 'n' Wild Black Creme. Let dry completely.
 
Step 3: Taking the bigger end of a dotting tool or a tooth pick you snipped the end off of and dip it in to your favorite white polish. I used Pure Ice Superstar, then dot two dots close together to create the whites of your eyes. Let Dry.
 
** Optional Step**  Once the white polish is dry taking the same end of the dotting tool you used for the white dip it into glow in the dark polish and go back over the white so you eyes glow!
 
Step 4: Taking the small end of the dotting too or the opposite end of the toothpick that isn't snipped off, and dip it into black polish then do the inside of the whites to create pupils for your eyes. Let dry.
 
Step 5: Once your design is dry use your favorite top coat to seal it all in!
 
okay so I hope that this design is something that you guys will try, especially if you are new to nail art. It is so simple, you can also do it as a last minute design for Halloween!
 
Okay guys till next time! <3 Nicole  


Wednesday, October 24, 2012

Halloween Splatter Manicure Inspired By Chalkboard Nails!

Hello!!! It is Wednesday, offically one week until Halloween! I cannot believe how fast this fall season is going! I don't want it to end!

Today I bring you a manicure that I did, inspired by Sarah of  Chalkboard Nails! She posted a black and orange splatter manicure a little while back and I fell in love with it! I haven't attempted a splatter manicure since last Halloween and at that time I was so very new to nail art. I tried to accomplish that splatter with a paint brush; I tapped the end of it to try to get it to splatter. Needless to say I only accomplished one hand before I gave up!

The lovely Sarah accomplished her splatter by using a straw and dipping it into polish and giving one good puff of air through the straw and a fair distance to achieve the best splatter.

So to recreate her splatter I used three coats of New York Color's Time Square, Tangerine Creme for my base. It is litterally the best Jack o Latern colored polish around! Three coats is great for opacity, Time Square is one of those squishy creme polishes that I probably could do a jelly sandwich with!

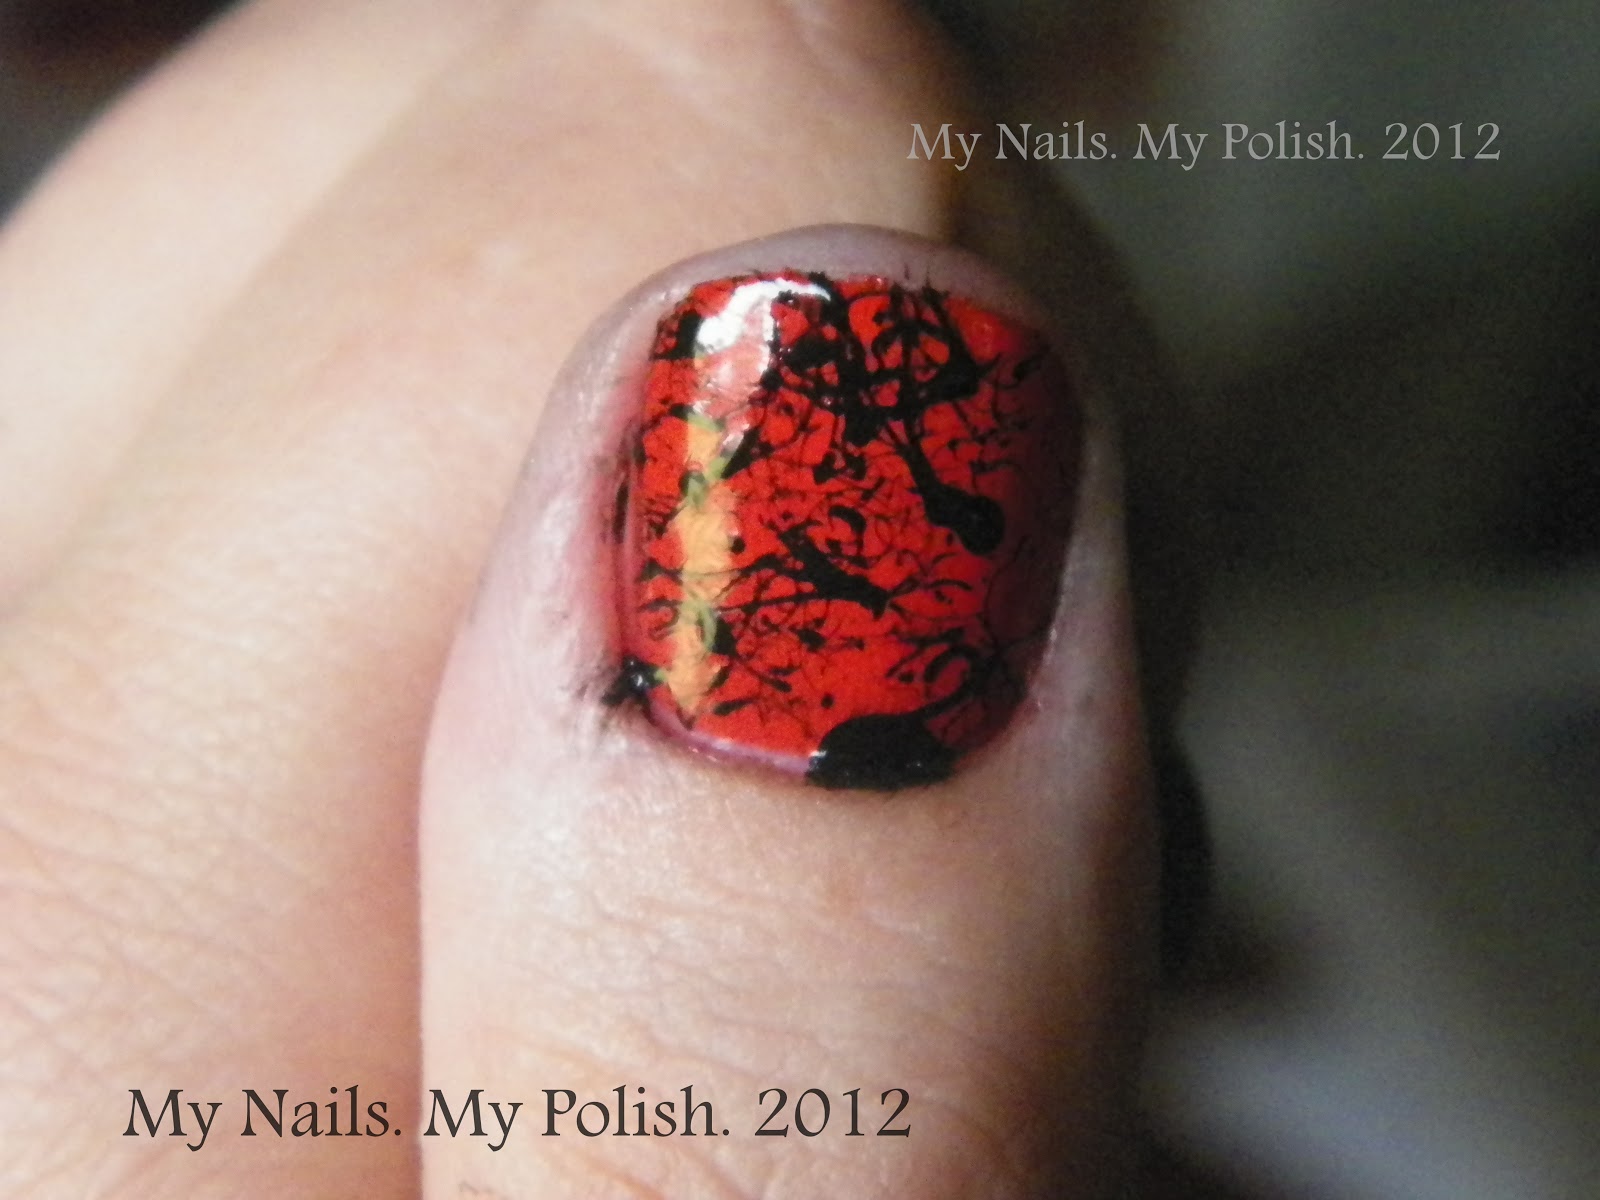
Then taking a drinking straw, I dipped it into black polish. I of course used Wet 'n' Wild's Black Creme Polish. Once I had the polish dipped in I had a hard time of deciding how far to pull back to shoot the splatter out on to the nail!


As you can see I got a little over zelous with my ring finger on my left hand. I had the distance between my nail and the straw to short and a little too much polish in the straw. I feel my thumb came out nice and my right hand which is the last picture came out the best, since by then I had gotten a handle on things.

I hope you all enjoyed this post! Stay tuned for my Halloween inspired post throughout the week up unil Halloween!

Unil next time <3 Nicole

Monday, October 22, 2012

Wet 'n' Wild Fantasy Makers: Once Upon A time.

Hello and Happy Monday!

Today's polish is going to be one that I debated on getting because believe it or not I actually have a dupe for it.

Today I bring you Wet 'n' Wild's Fantasy Makers Once Upon A Time, this is one of the tombstone polishes that Wet 'n' Wild releases every year at Halloween time. I love the bottles shapes from this collection I have only one other Halloween shaped polish  and that is the shape of a coffin from the Fright Night Polishes. That is another polish I possibly have a dupe for, so stay tuned to My Nails. My Polish to see it!

Once Upon A Time is a black jelly based polish that is packed with small round red glitter and larger red hex glitter. I believe that this is another dupe for a Deborah Lippmann polish. This polish should be layered over a dark or black creme polish, trying to wear this by itself is probably going to take many coats to even get near opaque.

In my pictures I have it layered over I Don't Drink Cheap Wine from Wet 'n' Wild's spoiled line.  I did about two coats over IDDCW and put a layer of Sally Hansen Insta Dry to seal it in.


Okay so now for the dupe part! Looking through my stash after seeing this polish was released, I found that Spoiled Ants In My Pants is a dead on dupe! Same type glitter and base, and to be honest its a well duh moment because Spoiled is by Wet 'n' Wild! So if this Halloween Season you cannot get your hands on the fun shaped bottle that is Once Upon A Time, then you can definitely find it as a permanent polish with the Spoiled line.

Okay so that is it for now! Hope you all have a fabulous day!
<3 Nicole

Thursday, September 13, 2012

Red Cheetah Nails. Rawr!

Hello! Happy Thursday!

Today's post is inspired by the concept of the Jelly Sandwich. I've explained what a Jelly Sandwich many times here on the blog, take a look at this post here if your not sure!

Taking the concept of the jelly sandwich I decided to try encapsulating a stamp instead! Same general idea just using a stamp in place of what would be glitter. It also makes me think of the amazing nail polish jewelry out there in the world!

Starting off I used one coat of Sinful Colors Ruby Ruby, a brilliant red jelly polish that is readily available in drugstores and now even Walmart, that's where I got mine from! Of course you do need to start off with a base coat before your polish so you can protect your nails. I recently purchased Orly Bonder about a month ago and have been using it in every manicure I do and it is wonderful! The coolest thing though is I've even gotten my mom to start using it, and now that she is retired (what a lucky duck) she is testing the waters on different color polishes too!

Bonder is a rubberizing base coat, at least that's what its described as being on the bottle, it dries super quick and definitely makes the polish smooth and stay on longer ( not that I keep my manicures on for longer than 3 days anyway).

OK so back to the manicure. Once the first coat of Ruby Ruby is dry, I took Wet 'n' Wild Black creme, my holy grail black polish for stamping, and stamped the cheetah/leopard print from the Salon Express Kit. Normally at this stage you would be done, add a top coat and bam, but no I went and added another thin layer of Ruby Ruby once the stamp was dry. It does dull the stamped design just a little but that's okay its what we want, the black creme is still very much see-able but it looks like its encased in the nail!

I tried this with a few other color stamps and white actually would of looked really cool, it gave a very subtle effect but not what I wanted. Once your top layer is dry add you top coat and you are done!

Take a look at the pictures if my long winded response confuses you!


Okay so I hope you liked this post! Stay tuned for more soon!

Nicole  

Friday, August 10, 2012

OPI Pink Friday, With a bit of stamping and some explaining.

Hello! Happy Friday! I hope that your weekend will be sunnier than mine! The forecast is for it to rain all day today and into tomorrow morning. Sunday will be a nice day but I have to work that night so I won't be doing to much :(

So I feel like a Starburst, you know how in the Starburst candy commercials they call them a contradiction... yeah that's how I feel lately. I know I said I was going to do the Summer Challenge... I don't think that its going to pan out :( and I know I said I would continue with the Sprinkles collection from Nails Inc, I have two more of those to swatch still. So I feel like a contradiction saying one thing then doing another...

I don't like contradictions or people who present them... but I guess I could say its being  hypocritical right? I hate that too. Anyway I'm sorry and I thank all of you for who take time to read my blog and dealing with my randomness. I think that's just how it might go for a little while until I get myself organized better.

Okay so enough of the pity party for one in the paragraphs above, I DO have some exciting news to announce! My Nails. My Polish has hit 100 followers on Twitter!!! When I saw that last night I got super excited! I told my mom about my little blogs land mark and she just went.."ohhh". Its okay she doesn't follow the whole social media thing and how important it is to bloggers like us! Anyway though a HUGE thank you to everyone who follows!

Now if I could get 100 likes on my Facebook Page??? Could we see that happen? Maybe even 10 likes as a more realistic goal right now. My little page only has two likes :(

Okay okay so on to the polish, that's why you all came here for right?

So today I am going to show you a fun bright manicure that I hope will melt away the rainy blues.

I started with 3 coats of OPI Pink Friday from the Nicki Minaj Collection. I have the mini version of this polish but I might have to get the Nicole by OPI version from the Kardashian collection.

I then stamped some pretty flowers  using Wet 'n' Wild Black Creme And Pure Ice Superstar from the Salon Express Stamping Kit. I seriously need to get either the Shany 2012 plates on Amazon or The Bundle Monster 2012 plates or the Cheeky ones, Which do you prefer??


Pink Friday is such a pretty baby pink color. The first coat was a little streaky and if your not careful you definitely get brush drag, but that could also be from the tiny little OPI brush. Upon Second coat I had opacity but it was still a little streaky so I went for a third. I am definitely going to say that Wet 'n' Wild Black Creme and Superstar from Pure Ice are my go to drug store stamping polishes. I have never had a problem with Black Creme and this was the first time using Superstar for a white stamp.

So that's it for this Friday post. I hope you enjoyed it! Don't forget to hit the BECOME A FAN button at the top of the blog to like my Facebook page!

Thanks so much and talk to you soon!
Nicole

Monday, July 9, 2012

Beach Cruise-r on the Hollywood Walk of Fame.

Hi! Its Monday, not my most favorite day of the week. Although what better way to pass the time with a new blog post!

Today I bring you a star filled neon manicure. This past week has been crazy! Tuesday was my 25th birthday, then it was the fourth of July and then I spent most of the week hanging with my family and friends. Of course I treated myself to some new polishes over the week and I will feature them as soon as I can.

But I figured I could start out with a new polish I bought at my local Walgreens. I'm talking about the Fergie Collection from Wet 'n' Wild. I have been lemming that star polish! After dropping my dad off at the train station early I popped in right when they opened to take a peek.

 I was super excited to find the entire Fergie Collection practically untouched at the end of one of the beauty isles. I immediately grabbed two of the three star polishes on the display and one of the gold and black glitters., I like a lot of the glitters they had, but I didn't have enough money to get all the ones I wanted.

When I got home I took off any existing polish and started off with two coats of China Glaze's Beach Cruise-r. Beach Cruise-r is a lovely medium dark purple neon. It doesn't have the shimmer that the other ones in the collection do. Application was very nice, not streaky like other neons are. Two coats gave me great opacity.

After letting it thoroughly dry I then set off to apply Hollywood Walk Of Fame. This polish is multicolored stars in a clear base. There are plenty of stars in the bottle and the clear polish is kind of thick. I could get lots of stars on the brush, the brush by the way I think is the same wide brush that are in the new Megalast colors. Not entirely sure though. Getting the stars to place where I wanted wasn't too hard but sometimes they come off in clumps and you have to constantly swipe the brush to spread them out.

What I was surprised to see was mini bar glitter mixed with the stars, I definitely like that. Sorry but the photos in this post I took with my iPhone. My batteries in my camera died and I have to charge them.


None of these pictures were taken with flash, all the light you see is natural sunlight from the window. With the clear polish being so thick in HWOF I thought dry time would be super long. It wasn't though. A good few minutes and the polish was okay to touch with my fingers. Letting it dry a little more I then applied my top coat and let that dry for at least 15 minutes before taking pics,. I didn't want to risk smudging. God knows I'm they champ when it comes to it!

So that's it for this post. Fergie's collection can be found at Walgreen's. Mine retailed for $3.49 a piece.

Until next time!
Nicole

Sunday, May 20, 2012

SNAAARKM Challenge Day 4: Glitter, Rhinestones, and FIMO! Oh my!

Happy Sunday!

Today marks Day 4 of the SNAAARKM Challenge! To remind you of what is yet to come!


Click on me to make me bigger if you can't read it!


Today is Glitter, Rhinestones, and FIMO! Oh my! I chose glitter for today since I don't have the other too! With my job even putting a nail sticker on isn't worth it. I had two on this past weekend on my thumbs and they came off by the time my shift was over. I also had put a top coat over them to seal them in! I don't feel right investing in something that's not going to last long. :(

Anyway on to the glitter portion of the challenge! I love glitter polishes! As much as a pain in the you know what to take off, ( unless you use the foil method) I love the way the sparkle in the sun!


The glitter I chose for this was one of the new Wet 'n' Wild Color Icon Glitters. I don't remember the name of the collection I think its Bejeweled. They all have royal sounding names though.

The one I used is called Speak When Spoken To. I also own Bow In My Presence. These are color shifting glitters, similar to the China Glaze Prismatic.

I layered about three coats over Funky Fingers Sugar Plum Fairy. I really wanted to capture the color shift and got some of it but I didn't get the best sun since it was going down when I went outside to take pictures.


Its primarily a blue toned glitter and then shifts to a pink/purple in the light. It super pretty on the nail in real life in the sun. The first picture I was trying to get the pink to show through and due to my poor timing of lighting I only got the blue side. I wonder though if the choice of base has anything to do with it.

So that is it for my glitter challenge day! I hope you enjoyed it. I'll try to do a swatch by itself of the nail soon with Bow In My Presence.

Meanwhile, check out my other girls who are doing this fantastic challenge!
Don't forget to follow all of us on Twitter!

The Little Canvas                        Dream A Little Dream Of Polish

                           Sincerely Stephanie                                Fashion Footing

Let There Be Lacquer                                            Polish Pixelle                 In The Name Of Polish


Saturday, April 7, 2012

Easter Bunny Ahoy!

Hello again!

I just couldn't stay away today! I know I said that I would post my Easter Bunny manicure tomorrow on Easter itself, but I took off my water marble and did a different manicure I would like to post tomorrow, sooo ...

I wanted to do some sort of nail art for Easter.My lovely friend over at The Little Canvas, did some amazing Easter nail art. Four of them to be exact. So I definitely had lots of inspiration to draw from! Go on and click her blog name to check it out!


So For this Easter manicure I started with my background color of Wet 'n' Wilds " I Need a Refresh-mint". As I have heard it is an exact dupe of For Audrey!  After letting that dry I used a toothpick by snipping off the pointy bits to create a dotting tool and proceeded to create the bunny on my ring finger. To make his the pink of his nose and his ears I used Simply Sweets Pink creme I got from Marshalls.


Then using more toothpicks I snipped the ends off of, I dotted pink and yellow on the rest of the nails to make it seem like Easter eggs.!


The first two pictures are in the setting sunlight and the last one is with direct flash.

I hope you all enjoyed this! I will talk to you all soon!
Nicole

Tuesday, March 6, 2012

Spoiled: By Wet 'n' Wild. Mind Your Own Beeswax!

Hello lovey readers!

Hope you all are having a great beginning to the week. So far so good for me on my end. I have come to realize I have lots of untrieds to get through and lots of colors in my collection that are not on the blog. So I will be working on those until I get my tax money and can buy some polishes. Right now the drug stores have limited stuff out and my wallet doesn't want to let me withdraw from it....

Anyway, back I believe it was last week I found out through Nouveau Cheap, (you guys know is my go-to for all things beauty related!) that CVS was going to be having a sale on Spoiled Polish. Spoiled Polish is made by Wet 'n' Wild, the sale was that you could get the polish for 2/$3. I couldn't pass it up since I don't own many of them, ( I am now up to four).

I first chose the color I am presenting to you today. Mind Your Own Beeswax! I do not own many yellows, well actually I only own one and that is Mellow Yellow by Sally Hansen. Trying to branch out of my comfort zone I chose this, seeing that it reminded me of CG Sunshine Pop from their spring collection.

I don't believe that Mind Your Own Beeswax, is a dupe for Sunshine Pop. Its a build-able sheer. Although since I don't own Sunshine Pop I can't do a side by side check. Honestly I thought it was too sheer. It does have the lovely golden shimmer that Sunshine does though. It took me five coats of polish to get it to opacity and I could still see nail line at times.


The first photo is probably my favorite, that what I was hoping for the polish to actually be. Opaque in two coats and a nice finish between a creme and shimmer. The middle picture is the polish in its true color, a darker, golden yellow. Finally the third picture you can clearly see my nail line on my pinkie and my pointer, and I think my ring finger, the next time I use this polish I will be using white as my base coat or a thin coat of mellow yellow. The drying time on this was not horrible but even though I waited a few minutes in between layers, I still could ding the polish easily.

For a $1.99 or $1.50 this polish is a good buy even if you have to use a solid color base under it. I'm glad to have added it to my collection. If you like to have five layers of polish on your nails then by all means use five, but for me personally I can only stand about three, then drying time becomes an issue.

Hope you all have a fabulous day! Thanks for stopping by!
Nicole

Tuesday, January 24, 2012

31 Day Challenge. Day 24 Inspired by a Book!


Good afternoon polish lovers !

Today's challenge was to be inspired by a book. First book I thought about doing was Harry Potter but then I thought about my other favorite book, Twilight. I love this series, the books are amazing and the movies just bring it to life!


Friday, January 20, 2012

31 Day Challenge. Day 20 Water Marble Nails!

AHHHHH!  We have come to my favorite nail challenge of this whole thing!!

Happy Happy Friday Ladies!

Today I have for you Water Marble Nails!! I was so excited about this one, I watched dozens of YouTube tutorials and then went to work on practicing a few times. The key trick to water marbling is A: have room temperature water! I noticed if the water was too cold that the polish would dry quicker and you couldn't make a design. B: have lots of toothpicks and cotton swabs and remover available. C: Color combination! This is where it is key to your design, not all colors work together like you may think, I think I tried tons of different ones before realized what would work.

Thursday, January 19, 2012

31 Day Challenge! Day 19 Galaxy Nails!

OMG I cannot believe this challenge only has like 12 days left! I am sooo sad this will be over but I want to continue posting everyday! Maybe not a new manicure everyday because trying to do that now with this challenge is just too much!

Day 19 is Galaxy Nails! How exciting! I get to practice my sponging techniques yet again and this time I think I passed with flying colors!

For the polishes I used is OPI Linkin' Park After Dark as my base color...

31 Day Challenge. Day 18 Half moon Nails.

Hey guys!

Okay so first off I'm glad to say I'm back today with two post! I'm sorry I had to miss a day but we had a death in my family. :( My two younger cousins lost their dad in a terrible accident at his job at a ski resort. I'll spare you the horrible details but he was a life taken way to young from this world, we will miss him dearly! I'm more worried about his son and daughter then myself. I have never dealt well with death ever since the first death I experienced when I was 9. I don't get emotional and I get nervous and have no idea what to say. The only time I ever got that emotional was when my grandmother passed February of last year, I still get emotional from that time to time. I guess we just all deal differently.

BUT

Friday, January 13, 2012

31 Day Challenge. Day 13 Animal Print!

Happy Friday the 13th!!

I think that this has been one of the post that I could not wait to do next to the rainbow one! Ever since I got my nail stamping kit and saw that I had gotten a leopard print pattern I couldn't wait to use it.

With the salon express kit that I bought it is definitely a trial and error project. I think I went through every one of my polishes before I found out that only some of them work with the kit.

Friday, November 25, 2011

A little Party Hearty of Five Glitters

Hey all I just wanted to do a quick nail of the day! I know this mani was done everywhere when Party Hearty came out last year. But to me it never gets old to do for the holidays!

So to kick off the holidays ( for me at least) I used Seche Vite base coat, two coats of Sally Hansen White On, and then one coat of Party Hearty and then to give more color I used two coats of Wet n' Wild Party of Five Glitters! Oh and Sally Hansen Insta Dry Top Coat to seal it in!

Holiday designs will be up soon I'm trying to think of a few more to do.

Anyway here is my NOTD!