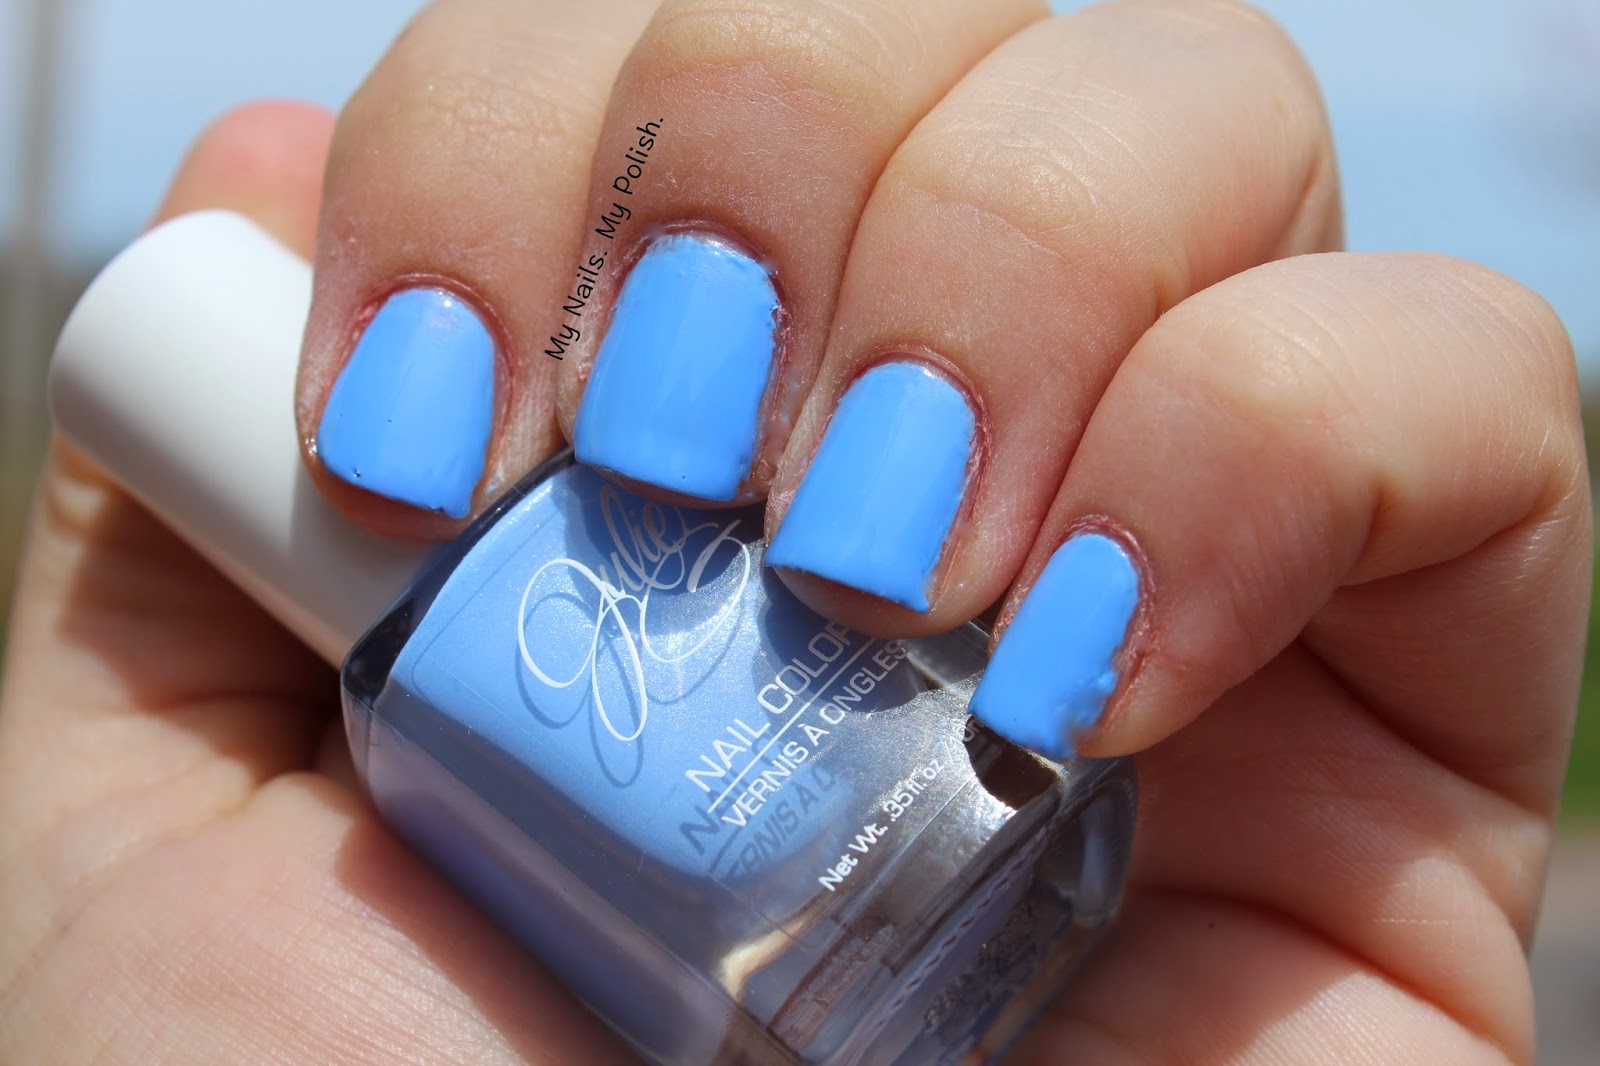
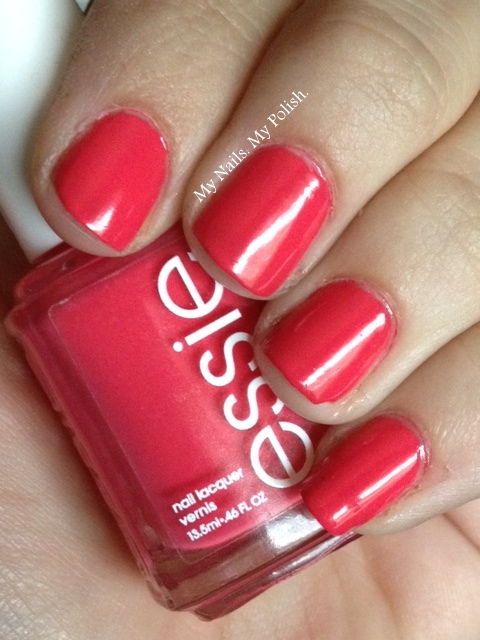
Showing posts with label Summer. Show all posts

Wednesday, July 23, 2014

Sally Hansen Xtreme Wear Berry Juicy!

Hi lovelies! How have you all been! Are you ready for some nail polish? I am! Lets get to it.

Today I have to show you a new Sally Hansen Xtreme Wear Polish to show you. I believe this polish came out as part of the new core line for the Xtreme Wears. I found in a small end cap display at Wal-Mart with all the summer stuff.

I love the name of this polish. Its called Berry Juicy, its a pale pink but not a baby pink. It definitely has some brightness to it.


Berry Juicy is a creme formula, and you know how much I love my creme formulas. The formula itself is nice, its not thin or thick it falls nicely in the middle. If you do try to apply more than one coat without letting each layer dry it will get thick and nasty looking on the nail.  Two coats will get you a nice opacity, thats what I used here in the photos.


This summer I am quite enjoy bright colors as usual so this is a no brainer favorite for me. It seems it will also be a good base for future nail art or stamping.

You can find Sally Hansen Xtreme Wear Polishes at drugstore or Mass retailer such as Wal-Mart or Target. I bought mine from Wal-Mart for $2.49 they were running a sale 2/$5 but $2.49 is the normal price!

Hope you guys enjoyed this quick post! I'll talk to you all soon! <3 Nicole


*Any products mentioned in this post were purchased by me and my own money. I am not being sponsered by any company mentioned. All opinions are my own.*

Sunday, June 1, 2014

Julie G Cruise Collection Swatches!

Good Sunday morning to you lovelies! I am so sorry its been forever and a day since I posted a blog post! That crazy thing called life just got a little hectic but hopefully things will be changing/looking up soon.

If you saw my latest YouTube video then you know I recently acquired five of the six Julie G Cruise Collection polishes. Today I want to share swatches of those polishes with you.

First up is Miami Heat,  its a bright pink coral creme that is perfect for the hot summer days ahead.


My photo makes it more of darker coral but its more a middle toned. The formula is nice, creamy not runny, opaque in two coats and dry time is normal. If you pair this with the Julie G Jet Set Top Coat then your polish will be unstoppable.  This color I can see on my toes as I dig my feet into the sand at a beach or a lake this summer!

Next up is Old San Juan, I have to say I'm not usually a fan of bright orange polishes, its just a shade that doesn't always suit my skin tone but this one is one of the few that does!


It makes me think of a color you would see at block parties and festivals that go on throughout the summer. It just makes everything brighter, like a ball of sunshine. Formula on this one was okay. The first coat was a little patchy but not by much and a second to third coat really smoothed it out.

Santorini seems to be the polish of this collection that everyone wanted to get there hands on! I remember seeing Julie G post a photo on Instagram from I believe IMATS showing that it was the one color completely sold out. I was so glad my Rite Aid had it in stock in full on the display.


I freaking love this polish, its definitely my favorite of the bunch, I love bright light blues. Once again my photo shows it a little bit darker, its really more of a sky blue color, but even in the photo above the sky can look that color too. The formula on this was just like Miami Heat, creamy and opaque in two coats. This one and Old San Juan were the first two polishes I tried from this collection if you saw this photo on my Instagram!

This collection features a yellow polish called Canary Islands. I am always hesitant on buying yellow polishes because they are either streaky and the formula sucks or they are just not the right shade of yellow.

Canary Island is a nice creamy buttery yellow that reminds me of birds (its the first thought that pops in my head) so I guess that name is appropriate for it.


The formula on Canary Islands is nice, creamy a little patchy on the first coat but not bad at all, I believe I used three coats to get what you see in the photo above. Its probably one of the better yellow polishes that I have tried over the three years I've been blogging.

Lastly we have Thaiti a beautiful mint green that has beautiful blue shimmer in it. I believe its the only one in the line to have a shimmer to it. Sadly you can't see it in photos but in person you know its there. I didn't know if I was gonna like this one to be honest because I have quite a few mint polishes and even ones that have shimmer in it. I thought that maybe Thaiti would be similar to
Julie's other mint polish called Sharks cove but alas I don't own Sharks Cove to compare.


The photo shows this to me more of a sea foam green color but its a little more lighter in real life. When looking at my other mint polishes its definitely a different shade, as most of us nail polish enthusiast know we can justify owning similar colors because they are slightly different. The formula on this was just like the others, creamy and takes about two to three coats to be opaque with the first coat being kind of streaky.

The only color in this collection I didn't get was a purple shade called Rio De Janerio. I didn't buy it because I didn't think the shade would look nice with my skin tone. I have other polishes in that shade range and I hardly wear them because I don't like the way they look. I offered to buy it for my mom because that's her kind of shade she has yet to take me up on my offer.

So out of the five polishes I did buy my favorites are Santorini, and Miami Heat. I mean I love all of them but if I had to choose two shades to go back to over and over it would be those two.

Julie G Nail polish is available at your local Rite Aid for $3.99 or on Jesses' Girl Cosmetics website! If you want some fun summer colors I suggest you pick these up today!


Saturday, April 12, 2014

Blue Cross Beauty: Summer Brights Nail Polish.

Hi everybody!! How is your weekend going. I am most definitely soaking up the sun on my end. Its in the 70's here at least until Tuesday before it rains.

Today I have for you a nail polish that is super appropriate for the upcoming warm weather!

On a recent trip to Rite Aid ( my holy grail for everything drugstore) I saw that Blue Cross Beauty, a brand I've only seen at Rite Aid came out with some bright fun colored polishes for the Spring.

Out of the five or six colors I saw I picked up the brightest blue that they had. I've been really into wearing bright colors the last few weeks, I think its just with the way I've been feeling at the moment plus I'm excited for warm weather.

Lets get down to it shall we? This polish a neon mid tone blue that has a slightly darker blue shimmer running through it, plus it has very tiny bits of silver glitter mixed in. They look great in the bottle but I don't think they transfer to the nail well, unless I just applied it too quickly, not giving enough time in between coats. In my case that's probably what happened, I'm so impatient.


I like this polish more with a top coat then matte. Hence there are no photos of it matte. The formula is a bit on the sheer side and it takes at least 3-4 to make it opaque enough for my liking so I don't see any visible nail line. The one bright side of the formula is its not to thick or watery so you don't have to worry about flooding or it getting gloopy.


Another highlight of this polish is the bottle. I absolutely love the chunky square bottle! It makes for the perfect hand position. All the Summer Bright polishes are a full 15ml so you are definitely getting your bang for your buck. If I recall these polishes are about $3.99. They had some other nice colors, like a mint green and a pastel pink and I think even a lighter blue, but this one called out to me.

I hope you guys enjoyed this post and I will see you next time! Don't forget to follow on Twitter, Instagram, and Facebook for other beauty/nail polish stuff!

<3 Nicole

Wednesday, March 26, 2014

Nicole By OPI: Carnival Cotton Candy. The Carrie Underwood Collection.

Hello lovelies! Its the middle of the week, I cannot wait to get today over, as you are reading this I will be at work, fun fun.

Today I bring you a swatch of one of the Nicole By OPI Carrie Underwood Polishes. I have only seen this collection at my local Walmart and they only have five of the colors which makes me sad.

Today I bring you Carnival Cotton Candy! I adore this polish so much! It is just the perfect girly pink creme. I wore this on my first day back at school this past spring semester but did a crappy job of applying so I never took photos.


Monday, December 16, 2013

Sinful Colors: Cool Gray.

Good morning guys!

Hope you all are having a wonderful morning! For those of us who are finishing up the fall semester at school, good luck to you all on finals!!! Today is my last day of the semester too but I don't have any finals. I just have to give a speech in my Business Communications class. I am the worst public speaker. This would be the third speech for this class and every time my heart feels like it it going to leap from my chest!

Anyway wish me luck on it and lets jump into today's post!

Today I have for you a polish I picked up in the fall that I clearly never got to swatch for the blog but I have worn and its kind of a favorite of mine. I remember my Wal-Mart had a huge middle of the isle display with all new and old Sinful Colors on it. Now I have had gray polishes in the past, the two that jump to mind are the Claw Polish in Phantom and China Glaze Immortal. I did a dupe post here if you want to take a look.

This polish just a straight up creme finish, which is why I love it so much. Cool Gray is the name and its is as the name says pretty cool. If you saw in my last post the Instagram shot I did of snowflake nails back last week I used Cool Gray as a base color.


The formula on this isn't thick or too thin, but you definitely need two coats to make it opaque. This is a polish I will find myself grabbing for anytime of the year. 


The photos were taken inside with a make shift light box I  made over the summer and don't have anymore because it got crushed. This also when my nails looked nice too, after the fall semester my nails took a nose dive and got really bad and I have had nubbins for the last three months. Hopefully now I can start to grow them out a little more. Although I do like having shorter nails it makes stamping easier. 

I hope you enjoyed today's post and I will have another one for you guys soon! I'm thinking it might be a make up post with some swatches of the new Lorac Sweet Temptations Eye Shadow palettes I just got a couple weeks ago! 

Until then! 
<3 Nicole 


Monday, July 29, 2013

45 Days Of Untrieds Day 12: China Glaze Of Coarse!

Hello!

So for today's untried I am continuing with the texture trend by showing you the next China Glaze creme texture polish I have. Its called Of Coarse, its a bright blue, a color that if it wasn't a texture I would definitely still wear! I kind of wish China Glaze Had this color as a creme. If they do let me know in the comments.


If you wanted to you could get away with one coat. I used two for all my photos.


I love this color its bright and its fun, in a weird way it reminds me the concrete around a public pool, you know how most of them have that popcorn texture and how most of the lettering is a blue color.

I think its important to let each coat dry before you add the next. I noticed on my middle finger part of my finger didn't 'texture' right because I may have brushed on the two coats too quickly.


One thing I was worried about with this polish was wether it would stain my nails and cuticles. I did notice during my clean up around my cuticles there was a little bit of staining that I couldn't get off. As for actual nail plate staining, I didn't really leave it on long enough to tell, and I did have a pretty decent base coat of Nail Envy on too. When I took this off I did notice if it got under my nail it stained the underside a little while trying to remove it.

Remeber to check out Adri's and Shaylads untireds too!

What are your favorite bright colors to wear around the pool?

<3 Nicole

Saturday, July 13, 2013

45 Days Of Untrieds. Day 3 Salon Perfect: Bermuda Baby.

Hello!

Hope you are all having a fabulous Saturday! I am most certainly having a great weekend, and I will tell you all tomorrow if it is getting even better.

Today's untried is another Salon Perfect polish that I picked up at the display of the Neon Collision polishes. This beautiful polish is called Bermuda Baby, one day maybe if I am lucky I'll actually get to go there.

Anyhow this polish a wonderful blue neon polish that reminds me of the water you would see around Bermuda.

If you google Bermuda beaches you'll see how this color fits in.


The formula on this was pretty much the same as Gone Sailing.  But the humidity definitely effected the drying time. I still love, love, love this color though. its like a bright blue sky on those days where not a cloud could be found.

I did have a photo with top coat but there were so many bubble it was not blog worthy at all!

These photos were taken in (1) natural light and the second one is under the light of a lamp which I no longer have.

So thats it for today's untried. I hope you will stay with us on this journey! Don't forget to check out Adrianna's untried, and @shaylads on Instagram!

Whats your dream vacation?

<3 Nicole

Friday, July 12, 2013

45 Days of untrieds...Day 2 Salon Perfect: Gone Sailing.

Good morning! Well we have reached the weekend! Who is excited??? Not me because I have to work all weekend!

Anyway today is day two of 45, I think I am really going to like this challenge. It is definitely going to help me get through most of my untrieds although I think I may have to repeat this challenge in the future to get through ALL of them.

Today's untried is a neon polish from Salon Perfect. I don't think I have featured a Salon Perfect Polish on here before, that's interesting. This polish if you choose to go looking for it can be found with its brothers and sisters at your local Wal-Mart. I know not everyone likes Wal-Mart, but when you live in an area where you don't have access to all the 'cooler' stores then sadly Wal-Mart becomes your best friend.

The display this polish can be found on is also the display with the Neon Collision Polishes, you know the matte glitter ones.

This is my first neon teal polish. I have plenty of teal polishes but none that are neon. I'll warn you now I forgot to put top coat over the polish after I took photos of it matte so these photos are all with a matte finish.


The formula isn't the best on these neon's but you know I haven't met a neon that didn't have a problem formula in some way or another. If I am correct I had to do about three coats to achieve evenness and opacity. Since its been humid here, (and thankfully the humidity broke for a couple days starting yesterday) it hasn't been optimal polish weather.

I think this polish looks really pretty matte and if a top coat is added its going to look like the shimmery China Glaze neon's that they released last summer. If you didn't know, China Glaze and Salon Perfect are made by the same people, so if there is a color you can't find from CG you might be able to get it with Salon Perfect. That's how I got a nice bottle of Flip Flop Fantasy, but its called Flamingo Flair.

Salon Perfect Polishes will cost you about $3.98 a bottle which isn't bad at all. I hope my Wal-Mart gets in more colors so I can buy more. I need more polish like I need a hole in my head.

So that's it for day two of our untrieds challenge. Don't forget that you can go and check out my dearest polish friend Adrianna over at Morie's Nail Art, to see her untried of the day!.

Ok so this post isn't completely over yet, if you notice at the top right corner of the blog I have a small poll going. I want to know what you would like to see from Free For All Beauty Friday's, There are three choices I think sum it all up. Please take a moment and vote it would greatly help me in future blogging!!! 

Until tomorrow! <3Nicole

Wednesday, June 12, 2013

Summer Leopard Nails. Rawr!

Hi guys!

Hope you all are well as always!

I don't usually do a ton a free hand nail art. If you saw Monday's post you know that, that nail art has been by far my best and favorite. The reason why I don't usually do free hand nail art is because I'm not really to good at it. In the beginning when I started blogging and doing nail art I was loving it and learning everyday and then I fell out of doing it so I've lost some skill, but I am slowly bringing it back to the surface and I hope more free hand nail art is in my future!

Back almost two week ago I was getting ready to see my bestest of friends in the world. She was going to pick me up for a dinner date and some girl time. I suddenly felt the need to gussy myself up in the 85 degree weather we were having. So as I did a whole face of make up and tried not to sweat it all off as I put it on, I decided I needed to do my nails as well and I wanted something bright and fun.

I originally was going to stamp some pretty little images on my nails but the stamper didn't feel like picking up the image so I was stuck. What to do? Then I thought why not free hand some leopard spots. I have seen it done loads of times from tons of my blogger friends, I practically had the tutorial burned into my brain. So I went to work.

I started out with a base color on all my nails except my ring finger and thumb of Fresh Paint (which is sold at Five Below) in Coconut. Coconut is a creamy off white color that is opaque in two coats, but the best thing about it, is that it has a peachy undertone to it so it doesn't look stark on your hands, its blends with my skin tone nicely. On my ring and thumb fingers I painted two coats of Sally Hansen Coral Reef,  how come I have only just bought this color, I will never know. It is such a pretty bright corally pink.

Once my bases were dry I went to work on the spots. I took a toothpick and snipped off the end and filed it down to make a homemade dotting tool since mine had disappeared for the time being. I dipped it into Coconut and went about placing not too many random dots on my ring and thumb finger. Once that was done I took a fresh tooth pick and didn't snip the end off it and dipped it into some Wet 'n' Wild Black Crème polish and outlined my dots with some 'C' shapes and added a few tiny black dots to give it more dimension.


As you can see the second picture is of the famous "claw hand" so you can see my thumb.


All these photos were taken in natural light with no flash and yes there is a top coat on my nails. Coconut looks like it has more of a yellow undertone in the photos but I assure you in real life its more peachy. I am actually really proud of my nails here since it was the first time in months doing free hand. I got a few compliments on these nails and don't let the photo fool you these are nice and bright for the summer time.

If you want to get a hold of the Fresh Paint Polishes they are available at Five Below usually for 3/$5 or two bucks a piece I think. When I got Coconut they had quite a few bright pastel crèmes out, two of which will be on the blog later I am sure. You can get a hold of the Sally Hansen color Coral Reef wherever your Sally Hansen Polishes are sold. I got mine at Wal-Mart for I think $1.99.

I hope you enjoyed this nail art! What are some bright polishes or nail art you will be sporting this summer???

<3 Nicole

Thursday, May 9, 2013

Julie G. Frosted Gumdrop: Blueberry Fizz

Hi guys!

Hope you all are well. My allergies have been attacking me for the last week and a half and they have finally decided to let me breathe again! I love the nice weather but we seriously jumped straight to summer here in good ole NY! Every flower and tree bloomed early and sent pollen on an all out assault on us allergy sufferers!

To celebrate being back from allergy hell I bring you today Julie G. Frosted Gumdrop textured polish in Blueberry Fizz! I was so excited when I first heard that Julie G. and Jesse's Girl Cosmetics were going to bring out this limited edition summer line, I was staking my Rite Aid as soon as I saw people on Instagram posting pictures of sightings around the states! Finally on a Monday night when my mom and I had to go to Rite Aid for some things there I found them full display and all!

I only purchased four out of the six, the two I left behind were the orange shades, I'm not huge on orange on my nails but I like it fashion styles.

So I chose Blueberry Fizz to try first since it was the one that stood out the most to me! These textured polishes remind me a lot of the OPI Liquid Sand Polishes but a bit more sparkly. These dry to a matte finish but leave the small bits of glitter sparkling through!

I would describe Blueberry Fizz's color as a pale blue but not a sky pale blue its much more dusty then that, its not the exact color of a blueberry, you know that dark blue with the bluish-purple center when they get squished. If the scent blueberry had a color this would be it. Do you follow that? I'm not sure if I do either but that's how my brain wants to describe it. In other words the name fits the color perfectly. But another way to describe it just popped in my head while writing this; this polish reminds me of the color of Cinderella's gown in the Disney movie when she goes to the ball!


Blueberry Fizz is opaque in two coats, the polish isn't too thick but thick enough that you definitely do not have to worry about flooding your cuticles. The frist picture is a more color accurate photo of the polish. I couldn't get a photo that showcased how pretty the silver glitter bits are but trust me they are amazing!

The wear time is pretty good too! I got through three-four successful days of wearing this color and only had minor chips on the corners of my nails. I find that they also remove better with polish remover than most glitter polishes!

Overall I really liked this polish from Julie, All her polishes are awesome and I need to buy more of her core collection! I hope to show case the three other Gumdrop polishes soon her on the blog!

If you want to get your hands on these polishes definitely check your local Rite Aid if you have one, if you don't have access to one you can also get them online at Jesse's Girl Cosmetics website!

Do YOU own any of the new textured polishes out there, not just Julies? If so leave a comment below and tell me what you think of them!

That's all for this post! See you next time !
<3 Nicole

Friday, April 26, 2013

Free For All Beauty Friday! Physicians Formula Super BB Cream!

I have nothing to disclose, any and all products mentioned are purchased by me.
Happy Friday!

Congrats to all of you who have the weekend off! As you are reading this I will be at work and praying for 4 o' clock to come quickly! I have Saturday off and its my dads 60th birthday! It is a very special birthday since he is finally home from his stay in the hospital!

So HAPPY BIRTHDAY DAD!!!

Okay on to my very first volume of Free For All Beauty Friday! I have been putting this off since I first mentioned it because I have been so nervous to write up this post! As much as I love nail polish I love make up and beauty products equally as much although the size of either collections vary.


Today I will be giving my thoughts on the Physicians Formula Super BB Cream. I have always used liquid foundation when applying my makeup, so when I heard about BB Creams I didn't really know who or what they were. I had heard of Japanese BB Creams and how amazing they are. Sadly I know I would probably never get my hands on one so I would have to give the American counterparts a try.
After watching many reviews on YouTube, I decided to give it ago and see what I could find. I also wanted to try a BB Cream for when I go on vacation this summer so I don't have to pack a glass bottle of foundation in my suitcase.

I chose Physicians Formula because well I'll be honest, it was partially the brilliant white packaging with the holographic design on it. But I did choose it because it supposedly had 10 plus benefits, an SPF of 30 broad-spectrum and was recommended by the Skin Cancer Foundation for daily use to help protect your skin from the sun.

Here is what the packaging looks like. Plus a close up of the 10 plus benefits.


As you can see after you open the box you get 1.2 fluid ounces of product. Now I purchased mine back just around Valentines Day, and its now the almost of end of April and is sill have just about under a third of product left. So its lasted me about two and half months. It will most likely make it to the middle of May before I have break in to the back up that I purchased.

As for the 10 plus benefits I could go through them individually but then this post would be super long. So I'm going to break them in to sections. The first three are  smoothing, moisturizing, and protecting, I have to say these benefits prevail to be true, the BB cream goes on smooth and blends really well, I do feel like I put on moisturizer with this, my face doesn't get dry or cakey, I still put on a separate moisturizer before putting this on though, its just in my routine. As for protecting well duh it has SPF broad-spectrum 30 in it so its going to help. Obviously you wouldn't use this as regular sunscreen but for being out and about on a girls day or just sitting outside its really good for that, if your going to be in the water or on the beach in direct sun clearly you want a higher SPF sunscreen!

The next 3 Firming, Priming and Filling, and Perfecting, I would say for I don't really notice a difference, I don't like primers but this doesn't feel like one, I definitely don't get that silicone feeling when applying it. Since I'm still young I don't have to worry about firming if it does firm anything I don't see it. Perfecting, I don't think it does that, I still have to spot conceal and conceal my under eyes.

As for the last four Concealing, Brightening, Line Softening, and Long Wearing, I feel it does even out my skin tone well. The only downside is that this product only comes in two different shades. Light/Medium which is what I wear and Medium/Dark. So if you fall outside the two shades or stuck in the middle you might like this product. Some say Light/Medium is too light and Medium/Dark is too dark, and its sad there is no in-between color. For brightening I think it does lighten my face a little but that goes with evening out my skin tone. For Line-Softening and Long Wearing, once again I'm on the younger demographic for this so I can't tell if it works for that, as for long wearing I think it last well up to about the 6-7 hour mark. I have worn this to work and come home and still have a nice face but not as nice as when I first applied everything, When I wear this on a regular day and not really doing much it can last much longer as long as I'm not touching my face which is a bad habit of mine.

So here is what the product looks like.


I get about light to medium coverage out of this BB cream, if I don't have many blemishes (which is a rare day) it makes my skin look nice, but like I said above I do have to use separate concealers to finish the covering up when I want to wear a full face of make up. If I have a lazy day and just I am just running to the store and don't have to put a lot of make up on then this can actually work well by itself and I just set it with powder and be on my way.
 
 I do like this BB Cream, I think it will be good for Florida because it is light weight on the skin and with the humid weather down there I think it will be an excellent choice to a heavy liquid foundation.
 
For price point it is on the expensive side of the drugstore makeup lines. If you want to purchase this it will run you about $10-$13. But there is a brighter side to it. I have seen a lot of these in stores with $3.00 coupons on them and drugstores like CVS and Rite Aid are always having sales on Physicians Formula. When I bought mine I got it for 40% off which brought it down to $7-$8 and then with the $3 dollars off it was brought down to $4-$5! Not bad at all if you ask me.
 
So if you want to give it a go wait for it to be on sale and then you won't feel like you are investing large amounts of money on a drugstore product.
 
I hope you guys enjoyed this first FFABF post and I'll see you next time !
 
<3 Nicole
 
If you guys have any comments or questions or even suggestions on what you would like to see for any future Friday post please leave it in the comments below! I would LOVE to know! Thanks!


Wednesday, April 24, 2013

Essie Peach Daiquiri

*Purchased by me*

Hello!!! *waves frantically*

Happy middle of the week! Don't we all love it, it means the toughest part is over and yet only a few more days until weekend freedom! I'm excited because after today I hopefully get to see my best friend/sister, I haven't seen her or my niece in almost two weeks. Usually we get together at least once a week but with all the craziness going on between our families it just didn't come together.

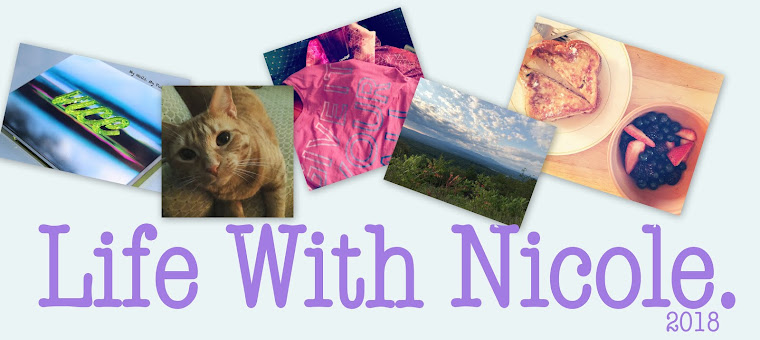
Anywho on today's polish post! One brand I have said I don't have many of is Essie, I think my grand total is a whole six. I know for someone who is an addict you would think I have more than that of Essie. Every once in a while I see a color Essie has out and it just calls to me or I find it on sale at TJ Maxx (which reminds me I need to go there soon). The latest color to jump out at me was Peach Daiquiri.

Peach Daiquiri is not the color you think it is. It is definitely not a peach color. To describe the color it is more of a strawberry coral color. So when applying it to the nail you'll notice it is more on the red toned pink side of the color spectrum.

I absolutely love this color, I plan on wearing this a lot over the course of the summer months, I'm definitely putting on my list of what colors I want to wear on my toes when I go on vacation to Florida  in a about a month and a half. Actually its about 48 days away!

So enough gabbing here is the pictures!


In these pictures I have two coats on plus a top coat. Application was really nice, a little streaky on the first coat but I encounter that a lot so it doesn't bother me so much and doesn't really become a factor in deciding whether I like a crème polish or not. I did notice that if you have any trace of dirt under your nails it can be visible through the polish. I did have a bit of chipping but I chuck that up to my job and probably me not wrapping my tips in top coat like I should.

So if your looking for a nice bright Essie color Peach Daiquiri might be right for you. Essie is available at most drugstores and Wal-Mart etc. I paid $7.75 for mine at my local Wal-Mart but remember as always prices may vary depending on where you live and what store you purchase your Essie polishes from.

Until next time!
<3 Nicole

Wednesday, March 20, 2013

Spring has Sprung!

Well hello again!

As promised in my last post here is my next post that is Spring nail oriented!

A while back before my two weeks of hell started I did some freehand nail art which I don't always get to do because I suck at it! I'm practicing when I can but nothing turns out the way I would like it to. I think that's why I stick to stamping so much.

Anyway enough pity party for one up there in that last paragraph lets get to it. Since Spring is FINALLY here, I cannot wait to start wearing bright clothes and spring dresses and not heavy sweaters and boots! Even though the temperatures are not Spring worthy yet, were still in the upper 30s to 40 degrees here in NY. A funny fact is that the weather guy the other day said that one year ago at this time we were actually having a heat wave, it was almost 80 degrees here last year! I wish we could have it back! We still have 3 inches of snow to get rid of!

Anyway one part of spring that I love is when all the pretty little butterflies come out, so that's what I decided to recreate was butterfly wings. I have seen so many nail artist recreate these I wanted to give it a shot. My favorite butterfly is the Monarch Butterfly as seen over on the left.


So to create my version I started off with three coats of China Glaze Orange You hot from the Summer Neon (2012) collection.

Here is a swatch photo of it on its own.


My photo makes it look more golden but its not it is very much orange! I couldn't get my editing program to color correct it :(.

Then I did a gradient of Love's a Beach on my tips, and then with a fine nail art brush from my Cheeky kit I got for Christmas I did the black out lines and then the white dots with a fine dotting tool also from the same kit.

All photos were taken with top coat and in natural light with the exception of the swatch of Orange You Hot that has no top coat.


For a first time take on butterfly wings I have to say I like them a lot and actually wore them for almost a whole week before changing the polish due to chips and pealing.

Since spring is here I hope I get inspired to do more spring nail art post and to work on my free hand more!

So until then I will talk to you all soon! <3 Nicole.


*Any and all nail polish mention in the above post was purchased by myself with my own money*


Friday, January 25, 2013

China Glaze Loves A Beach.

Hello all! Happy Friday afternoon!

It has been bitterly cold here in New York for the past almost week, I can't tell you how much I want the spring time to get here!

To help combat the bitter cold today I have a polish that will make you want to go to the beach!

Loves A Beach is from the China Glaze Summer Neon's collection it is a medium bright florescent pink. You could compare it to Hang Ten Toes its just a shade or two darker.

When Loves A Beach dries the shimmer that you can see in the other colors isn't too prevalent, at least to me it isn't. The finish is much more of a matte satin. With the addition of top coat though the shimmer comes alive and creates a great back drop for nail art or glitter.


The formula on this polish is pretty good, three coats take care of any visible nail line. It is definitely a good idea to wait a few minutes in between coats so you don't get any brush drag or bald spots.

I still believe that The Summer Neon's is still available to purchase through the online E-tailers. So if your stuck in the bitter cold like I am or just in need of a spring-ish color then you might want to pick up a couple of these colors!

Do you already own any of the Summer Neon's?

<3Nicole

Saturday, December 29, 2012

My Top 10 Polishes of 2012! Part 2!

Good Morning and welcome to part 2 of My Top 10 Polishes of 2012!

Today I am going to show case my last five favorite polishes of 2012.

Lets get started!

First on the list in the second half is from Cover Girl! This fall Cover Girl released a nail polish collection with all different colors. I'm sure Cover Girl has had polishes in the past but this is the first I have seen them since I started blogging. Out of the collection that Cover Girl has to offer I chose a polish that I definitely don't own already or have anything close to. It is called Wine Stain. It is an dark blood red jelly finish polish that is super saturated with color and is right up there with my favorite reds.  I used this polish also in a Halloween manicure this year, it looked pretty really for fake blood drippings.


Next is a polish I never thought I would get my hands on. OPI is not commonly sold where I live but the grocery store that I work at sells it and sometimes we get in one or two of the new collections. Like right now there is a polish from the James Bond Collection hiding in the back waiting for me to purchase it this weekend!

Anyway my favorite OPI from this year is I Have A Herring Problem. Its from the Holland Collection that was released in the spring. It is a blue-grey polish that is just beautiful. It has this most amazing silver shimmer running through it as well.  Its the one polish out of the collection that if I was going to buy one it would be this one.


 Back in September my sister from another mister had a beautiful baby girl and when we had her baby shower one month before her due date I wore this next favorite. I got it when I ordered half the Summer Neon Collection from Head2Toe Beauty. It is Pink Plumeria. It is a lovely light corally pink neon. This collection of neon's is special, because they are not just BAM in your face neon's, they have a shimmer to them that even if you left them without a top coat they would still look amazing.

When I wore this polish for the baby shower I stamped butterflies over it and I think it was very appropriate for her shower. Take a look.


Second to last on my list was a glitter polish. What nail polish addict doesn't love a good glitter polish. I know I do. As much as they can be a pain in the you know where, I can't resist. China Glaze released a collection during the summer called On Safari. I was attracted to only the glitters. I'm Not Lion is a gold micro fine holographic glitter polish. In the sunlight it is super sparkly and would be appropriate I think in the work place. Its not loud its just right.


Last but certainly not least is a polish that I think a lot of nail polish lovers liked. I know I had a few conversations with people about it. China Glaze's Wicked Halloween Collection had a couple amazing polishes in it this year, as you saw by my choice for Immortal. This last one is just amazing. Its called Bizarre Blurple. You know how here in the nail polish world we sometimes combine words to make a new that describes a polish? Well China Glaze caught on and gave us this beauty. When I took these pictures my camera didn't want to pick up the purple, as it never does it just got the blue of the polish. Doesn't matter though it still amazeballs!


So that's it! My Top 10 for 2012! I hope you enjoyed it as much as I did and if you wore any of these polishes this year leave a comment below!!
 
 
I believe my final post for the year will be a new years eve manicure so keep a look out for that!
 
Nicole 

Thursday, September 20, 2012

China Glaze: I'm Not Lion

Hey guys! Hope you all are fabulous!!!

I have been doing well, some awesome things are happening in my life! My best friend Stephanie, who has been my BFF for the last 7 years just had her first baby! Gianna Nicole, yes Stephanie was awesome and gave her daughter my name as her middle name! I was so excited when she told me she was pregnant! This was the first time I have had anyone close to me have a kid so I couldn't wait to be involved! Since Steph and I are like sisters I got to go to one of the sonograms and see baby Gianna, and I got to help with the baby shower! When Gianna was born I got to go the day after and see her and I got to hold her! Holding a one day old baby is amazing she so tiny and squishy! I can't wait to see her grow up and learn to talk and call me aunt pumpernickel (yeah that's my nickname)!

The other awesome thing happening in my life right now is that I am about to make my final credit card debt payment this week! Its taken me about a year to pay it off! Don't get me wrong I make sure all bills that need to be paid are paid first before I go out and buy anything such as clothing, make up or nail polish.


So anyway after sharing that awesome news with you guys, its time to show you my manicure! I finally decided to wear a glitter polish I bought back on my birthday in July. Today I have China Glaze's I'm not Lion!

This is a pale gold glitter that is finely milled and packed with some holographic bits as well! It is so pretty in the bottle and on the nail! You can wear this polish on its own like I am in this post or you can layer it over black or any dark color to make it pop!

Two coats is more than enough for opacity alone, it does dry very gritty. It's the one thing I hate most about glitter polishes and the fact they eat top costs like crazy! I love when a glitter dries smooth they are few and far between but they'd do exist!

OK so on to the pictures!


The first picture is with a flash and no top coat. The second picture is no flash with two coats of top coat (Sally Hansen Insta Dry) and the last picture is a blurry shot to see the sparkly-ness of I'm Not Lion.

I'm Not Lion is one of the glitters from the On Safari Collection from China Glaze and should still be available online through places like Head2Toe Beauty, Transdesign, and Victoria Nail Supply. Prices may vary by E-tailer. I purchased my polish at Sally's Beauty Supply when they had the collection.

Okay so I hoped you enjoyed that and I will have a new post soon! I have an idea in the works but it's not properly thought out yet :)

OK talk to you all soon :)

Saturday, August 11, 2012

Glitter Jelly Sandwich time! Glitter Jelly Sandwich time..

Like the title? Yeah me trying to be clever....Anywho, Hello!!!

Hope you all are having a good Saturday, its still raining here in good ole New York. Lucky me had to walk through a tremendous downpour just to get from my car to my front door... which has no awning or gutters so its like walking through a waterfall. Needless to say I got an unneeded second shower today!

Today I bring you another bright happy manicure. A jelly sandwich! Jelly sandwiches are so easy to do! You take a jelly polish, put on one to two layers of it, let it dry, add one coat of your favorite multi colored glitter polish or just some sort of glitter polish in general and then add one more thin coat of your jelly polish and TA DA you have a jelly sandwich.

Now you could save your self some time and buy the polishes that already have all the ingredients together and all you have to do is apply two to three coats of it. I personally wish I had more of those types. I don't own many jelly polishes myself in fact I think I only own one or two. Oh and if your curious as to what a jelly polish is, it is a polish that you can still see through/ or  see your visible nail line even after three coats.

Today's jelly sandwich consist of two coats of Sinful Colors Scandal. Now I bought Scandal way before all the Sinful Colors Hullabaloo. Now while I don't support what they did in any sense, it was just down right wrong, I'm still going to use the polishes I have... Since I'm on that no buy....

After I applied Scandal's first two coats and let dry, I then applied one coat of Confetti Polish in Tasmanian Devil. This polish is a good dupe for all those other rainbow glitter polishes out there and its fairly cheap too. I got mine from CVS but I don't remember how much it was, check with your local retailer to get the exact price for your area.

Once Tasmanian Devil was dry I applied one more thin coat over top to give the 'suspended' look. If I may say that it came out nicely.

 This first picture was taken with the flash on my camera, it only happened because the sun that peeked out right when I was ready to take pictures dashed away behind the clouds. :(

This is by far my favorite picture of the three in this post. It's in the natural cloudy light and it definitely shows the glitter suspended in the polish well. Plus the glitter is nicely defined in this picture too, you can see some of the individual colors.


Lastly this picture was taken under artificial light, a huge thanks to the overhead light of the stove for participating!

Okay so I hope you enjoyed this post and I believe by Monday this mani will be history, I'm assuming its going to peel off just like my last two did... grr.. don't even get me started on it. But by Monday I think the next sprinkles polish is in line to be posted!

Talk to you all then!
Nicole