Showing posts with label halloween 2012. Show all posts

Friday, October 26, 2012

Halloween Nail Art! Spooky Googley Eyes!

Happy Friday! Hope you all are well today!

In this blog post I am going to give you step by step instructions on how to get these nails!


Spooky googley eyes, we always see them around this time of year, whether it be as awesome Halloween decorations in lights or on pumpkins, or even in the dark of the night when you see that pair of creepy eyes staring at you in the dark.

I have seen a few people on instagram do these types of nails mixed with other nail art, and I wanted to take a stab at it!

I have not been able to stop looking at my nails since I did this nail art! They remind me of these light that my aunt ( god rest her soul)  used to put in her trees at Halloween time. I remember helping her put them in the bushes and trees. I always loved decorating her house for Halloween, she had one of those big houses that you could go all out and do elaborate scenes with. She did this especially at Christmas time!

I debated on doing different color eyes, like red, pink, bright green, or neon yellow, but kept it original just using white. I did dab over the white with glow in the dark polish but I guess I didn't use enough because my eyes don't glow :(


Here is how to get these nifty nails!
 
Step 1: Apply base coat and let dry.
 
Step 2: Apply two coats of your favorite black polish. Mine is Wet 'n' Wild Black Creme. Let dry completely.
 
Step 3: Taking the bigger end of a dotting tool or a tooth pick you snipped the end off of and dip it in to your favorite white polish. I used Pure Ice Superstar, then dot two dots close together to create the whites of your eyes. Let Dry.
 
** Optional Step**  Once the white polish is dry taking the same end of the dotting tool you used for the white dip it into glow in the dark polish and go back over the white so you eyes glow!
 
Step 4: Taking the small end of the dotting too or the opposite end of the toothpick that isn't snipped off, and dip it into black polish then do the inside of the whites to create pupils for your eyes. Let dry.
 
Step 5: Once your design is dry use your favorite top coat to seal it all in!
 
okay so I hope that this design is something that you guys will try, especially if you are new to nail art. It is so simple, you can also do it as a last minute design for Halloween!
 
Okay guys till next time! <3 Nicole  


Wednesday, October 24, 2012

Halloween Splatter Manicure Inspired By Chalkboard Nails!

Hello!!! It is Wednesday, offically one week until Halloween! I cannot believe how fast this fall season is going! I don't want it to end!

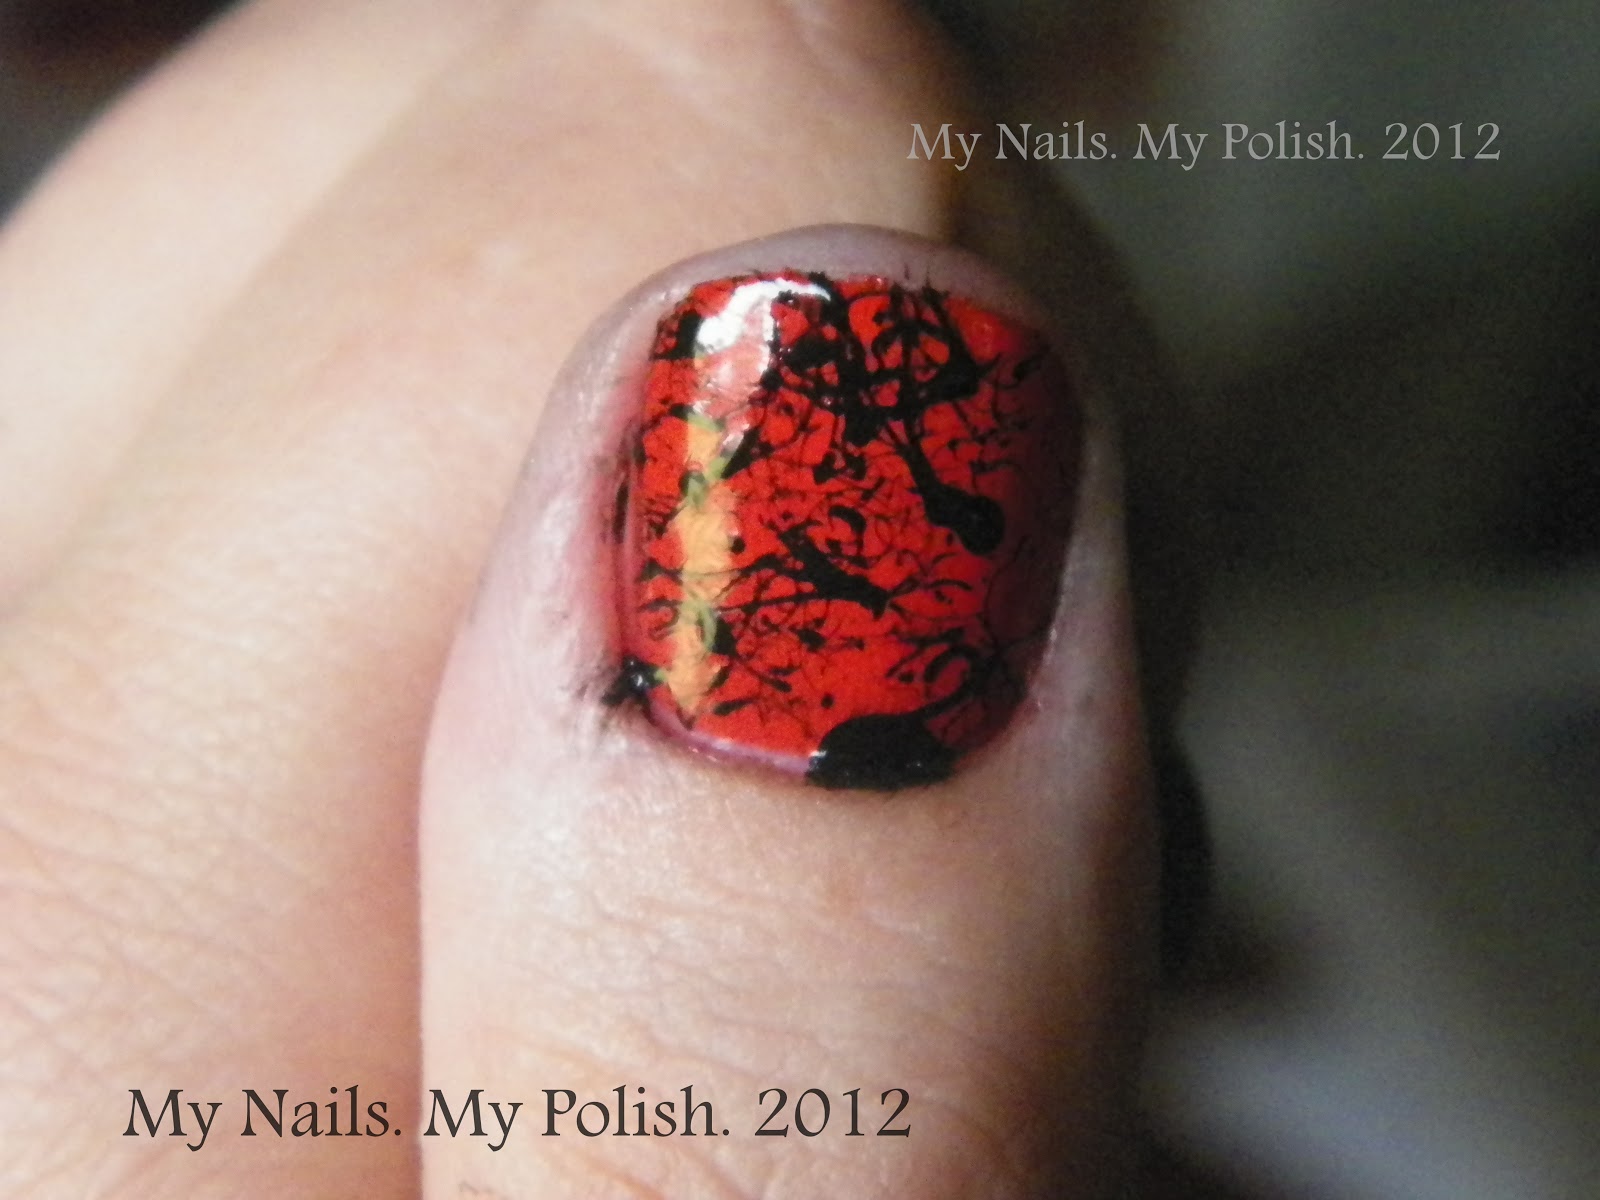
Today I bring you a manicure that I did, inspired by Sarah of  Chalkboard Nails! She posted a black and orange splatter manicure a little while back and I fell in love with it! I haven't attempted a splatter manicure since last Halloween and at that time I was so very new to nail art. I tried to accomplish that splatter with a paint brush; I tapped the end of it to try to get it to splatter. Needless to say I only accomplished one hand before I gave up!

The lovely Sarah accomplished her splatter by using a straw and dipping it into polish and giving one good puff of air through the straw and a fair distance to achieve the best splatter.

So to recreate her splatter I used three coats of New York Color's Time Square, Tangerine Creme for my base. It is litterally the best Jack o Latern colored polish around! Three coats is great for opacity, Time Square is one of those squishy creme polishes that I probably could do a jelly sandwich with!

Then taking a drinking straw, I dipped it into black polish. I of course used Wet 'n' Wild's Black Creme Polish. Once I had the polish dipped in I had a hard time of deciding how far to pull back to shoot the splatter out on to the nail!


As you can see I got a little over zelous with my ring finger on my left hand. I had the distance between my nail and the straw to short and a little too much polish in the straw. I feel my thumb came out nice and my right hand which is the last picture came out the best, since by then I had gotten a handle on things.

I hope you all enjoyed this post! Stay tuned for my Halloween inspired post throughout the week up unil Halloween!

Unil next time <3 Nicole

Monday, October 22, 2012

Wet 'n' Wild Fantasy Makers: Once Upon A time.

Hello and Happy Monday!

Today's polish is going to be one that I debated on getting because believe it or not I actually have a dupe for it.

Today I bring you Wet 'n' Wild's Fantasy Makers Once Upon A Time, this is one of the tombstone polishes that Wet 'n' Wild releases every year at Halloween time. I love the bottles shapes from this collection I have only one other Halloween shaped polish  and that is the shape of a coffin from the Fright Night Polishes. That is another polish I possibly have a dupe for, so stay tuned to My Nails. My Polish to see it!

Once Upon A Time is a black jelly based polish that is packed with small round red glitter and larger red hex glitter. I believe that this is another dupe for a Deborah Lippmann polish. This polish should be layered over a dark or black creme polish, trying to wear this by itself is probably going to take many coats to even get near opaque.

In my pictures I have it layered over I Don't Drink Cheap Wine from Wet 'n' Wild's spoiled line.  I did about two coats over IDDCW and put a layer of Sally Hansen Insta Dry to seal it in.


Okay so now for the dupe part! Looking through my stash after seeing this polish was released, I found that Spoiled Ants In My Pants is a dead on dupe! Same type glitter and base, and to be honest its a well duh moment because Spoiled is by Wet 'n' Wild! So if this Halloween Season you cannot get your hands on the fun shaped bottle that is Once Upon A Time, then you can definitely find it as a permanent polish with the Spoiled line.

Okay so that is it for now! Hope you all have a fabulous day!
<3 Nicole