Showing posts with label Glitter. Show all posts

Monday, January 13, 2014

A Fantastic Find from Five Below!

Hi lovelies!! I hope your Monday afternoon is going well. Its cold and windy here in New York, but at least its not bitterly cold.

I also ordered a couple text books for school today, I cannot believe school starts in a week as of tomorrow! This vacation has gone way too quickly!

Today's polish is a fun one! Back over the fall I took a trip to Five Below. If you haven't been to a Five Below or never heard of it,  it is a store that sells all kinds of products from beauty products to phone cases and even clothing! Plus everything is $5 or less!

In the beauty section a lot of the time Five Below has a deal on nail polish where you get three polishes for $5! Not a bad deal at all!

Only one polish caught my eye, and it is called Jawbreaker! It is a white milky crelly polish that is chalk full of different colored glitter!


This polish reminds me a lot of KB Shimmer 'Oh Splat'. I don't own that amazing polish however but one day I plan to own lots of indie polishes. I just need to get my tax refund first!

There is quite a lot of violet and blue glitter in this polish and occasionally you get bright red hex  glitter like on my ring finger and a bright yellow hex glitter that is also on my ring finger.


From looking at the bottle you can see all the colors of glitter mixed in. There is even teal in there! It took about three coats to get this polish to how I like a jelly sandwich to look. 

The drying time is about average for this polish and it dries smooth too boot! I didn't see any glitter bits sticking up and poking me as I wore this polish over the last four days or so. Once it did start chipping though is when I would get it caught in my hair, and at that point it just all peeled off in sheets anyway.

But considering the job I have where I am constantly using my fingers and banging them against a keyboard I can't say I don't blame the polish for chipping.

I really love this polish overall and would most certainly wear it over and over again because each time you don't know what array of glitter you will get!

Until tomorrow!
<3 Nicole.

Thursday, May 30, 2013

Julie G. Frosted Gumdrop Polish: Rock Candy.

Hello!!!

How are you all on this fine humid Thursday? Well ok maybe its not humid where you are but its  pretty humid here in the Hudson Valley. Yesterday we had some pretty wicked thunderstorms roll through because of the humidity, I happened to be at work when they hit, there is just something about watching a thunderstorm outside the grocery store with your fellow coworkers that just makes it interesting. If I was at home I probably would of been freaking out while staring out the window from a distance.

Anyway its been way too long since I posted, almost two weeks, I seriously need to get back on my schedule of every other day instead of being a lazy bum.

Today's post is going to be fairly short since if you saw by the title that I am showcasing another Frosted Gumdrop Polish from the fabulous Julie G Beauty! If you like the Liquid Sand polishes from OPI these are similar but a bit more glittery and way more affordable!

Rock Candy is the name of the polish and it doesn't remind me of rock candy at all really. To be honest I never like rock candy as a kid, I thought it was really cool looking but never liked the flavors. But the name of this polish did not put me off it, Rock Candy is a Teal polish that has a metallic look to it, but its not your normal teal color that we think of when we think teal polish. The metallic finish makes it a lot dustier and a few shades darker and it leans more toward s the green end of the teal spectrum.


The top photo was taken with the flash and you can really see the larger pieces of glitter that make this polish sparkle. The other two photos were taken in natural light. The one thing I have yet to try with these texture polishes is putting top coat over them. I hear from other bloggers that they actually look really pretty with a top coat. I am definitely going to have to try it sometime, I did try it once with one of the Liquid Sand Polishes I own and it totally ruined the polish. Maybe that's why I haven't tried it with these.

The Julie G. Frosted Gumdrop Polishes are available at your local Rite Aid for $3.99 or you can find them on Jesse's Girl Cosmetics website!

Hope you enjoyed todays post, tomorrow I am going to post my second volume of Free For All Beauty Friday, I think I am going to write about my May Favorites. I see favorite videos on YouTube all the time and since I don't do YouTube the blog is the next best place!

So Talk to you all then!
<3 Nicole  

Thursday, January 17, 2013

Sephora X Nail Polish: Chaotic

Hello lovelies!

Happy almost weekend!

Today I have a polish to show you that I was very excited to get my hands on. I first saw this polish when Jen from The Polishaholic featured it on her blog about a month ago I want to say. Sephora created a new line of nail polishes called Sephora X, they have a ton of different colors and finishes, this polish is a part of collection called 'The Toppers'.  It is a black and white glitter polish! How cool is that? I know that some of the best B&W glitters come from all the amazing indie nail polish brands out there, and I do hope to get my hands on some of them one day, I just have to set up a PayPal account, which I always forget to do!

So this Sephora Polish is called Chaotic, which I feel its name does suit it. It does look like it creates chaos on the nail when applied over certain colors. Over other colors it just looks freaking awesome.

The glitter make up of Chaotic consist of small round black and white glitter, black bar glitter, medium hex black and white glitter, and large black and white hex glitter in a clear base. I think I would been a little bit more happier if they had put a bit more white glitter into the mix, especially white bar glitter.


Application is fairly good, the small standard brush can get stuck with some of the big pieces of glitter in between the bristles which can make glitter placement a little clumped together. Dry time is good and the finish is glossy but a little rough to the touch, not so rough that its annoying to touch it though. A good coat of your top coat makes it all better.

In the two pictures above I used chaotic over China Glaze Loves A Beach from the Summer Neons Collection,( I will have a full review of Loves A Beach soon) I also used it over Essie Mint Candy Apple, (full review to come of that soon as well). I think Chaotic over MCA makes it look like mint chocolate chip ice cream, anyone else think so?

Anyway the availability of Chaotic is pretty good, if you cannot get your hands on one of the many awesomely amazing  B&W  Indie glitters then this can help you get by until you do. Most Sephora Anchor stores have the Sephora X line, if you only have access to the Sephora's that are located in some JC Penny stores then you won't find it there and you will have to order it online through the Sephora Website. This polish retail for $11.50 each, which is pretty steep price tag for only a 10ml bottle but hey it is Sephora after all.

Until next time!
<3 Nicole

Friday, December 21, 2012

Semi-Successful and yet to me Disasticures.

Wow! What a slacker I have become! I haven't posted a holiday manicure since the beginning of the month!!!

I was planning on posting a lot more but every time I sat down to do a manicure it would come out horrible and literally as I have heard my amazing nail blogger friends call a disasticure!!

I tried to do candy cane nails several times only to be disappointed in my stripe work. I can't draw lines free hand with polish for the life of me and at times this was even with a striper!

So in today's post I want to show you two manicures I did and how I felt they were disasticures. I feel I was way to quick with them, patience is not my forte.

First up we have Santa's coat. I saw on Facebook from China Gazes Official page some awesomely cute Christmas nail art and wanted to recreate some.

So I started out with my favorite red. Yeah you know the one... 100 points to the first person to name it!

                                                                          * * *
Ok s you guessed it China Glaze Cranberry Splash. I bought a back up of this color because it is that amazing!

Then I took some new nail art brushes that I got at Walmart and painted a black stripe across the nail for Santa's Belt. Once that was dry I took Sally Hansen Golden-I and made the belt buckle. I also added China Glaze Winter Holly on my ring finger and did some holly berries in the corner.
Now my friends loved it, thought it was cute and good. Me I could see the unevenness and where I missed spots and it just irked me. Needless to say I took it off a day or so later.


My next attempt for something Christmassy was candy canes with my new brushes....... Yeah no, it didn't work. The only nail that came out well was my pinkie. I tried every way, freehand, tape nothing made it look nice. I never took pictures of that manicure.

The next manicure was a semi success and I did like it but because of the nail art supplies I used and combined with my job it wouldn't last long.

It started out with me receiving a Christmas swap package from Adri from Mories Nail Art! She is truly an amazing friend and sent me my first Klean Colors and some awesome L.A. Girl polishes I never got my hands on! I also sent her a package but it hasn't reached her yet! Hopefully soon! If it doesn't get there Ill cry!


Anyway for this manicure I kept my pinkies as candy canes since they came out the best and painted the rest of my nails with Klean Color Winter wonderland! Winter wonderland is a beautiful sliver shimmer polish that is packed with small silver, red, and blue glitter. It really does make you think of snow and all the holidays and things that go with it.

It took about three coats to get opaque. Once it dried it painted tiny Christmas trees on my middle fingers with last years China Glaze Jolly Holly and amazing evergreen polish that is opaque in one coat. Once that dried I took some of the nail art supplies that Adri sent me in our swap packages , I got a pack of six mini glass jars of clear rhinestones, black rhinestones, two jars of fish egg supplies and these nifty tear drop-flower petal glitter. I used the blue tear drop glitter to decorate the trees and a clear rhinestone as the star. On my thumbs I dotted three red dots for holly berries and used the green tear drop glitters and the leaves. Once it all dried and was adhered I put on my top coat and was on my way.


I have to say I did actually like this last manicure. It wasn't too bad. For me working with nail art supplies like the tear drop sequins or rhinestones is new and i definitely need to learn to be a little neater with it. Although the manicure I'm rocking now I love and you will see that in tomorrows post!!

Until then!
Nicole

Thursday, December 6, 2012

Maybeline Color Show Sea-Quins!

Hello!!

Hope you all are having a wonderful Thursday I am doing well I am also waiting on the bestie to arrive with my peanut of a niece!


I have a fabulous holiday glitter polish to show you! It's from the Maybeline Color Show line the Limited Edition Sequins Collection!

The name on this polish is fitting its called Sea-Quins and it truly does look like the sea. In the bottle it looks teal, when applied on the nail you can see the beautiful blue shine. This polish is all different sizes of glitter in a blue green jelly base.

In my photos I am wearing three coats and two coats of top coat to get smooth. The dry time on the glitter is good, when I applied this it was only 5 minutes before the mail lady showed up with a package for me.

Needless to say the wear is not the best as with most glitter polishes. One night of work my right hand was chipped bad and now on the second day my left hand has about had it.

What I love about this polish that you don't see in the bottle is the chunks of bright cerulean blue hex glitter in it. That what makes it look like mermaid scales to me.

Take a look at the photos below and tell me what you think. I am really enjoying the new glitters that Maybeline has out in this collection I would check out your Rite Aid and or Walgreens for these collections!


Saturday, December 1, 2012

A very simple holiday manicure!

Hello my dears!

Hope you all are having a wonderful Sunday! Today I am picking my dad up from the train station! I'm excited to see him I haven't seen him since before Thanksgiving.

Another thing that has happened is we have had our first snowfall this year!! It's only like a half inch but still it's snow! Sadly it will be gone by Tuesday as they are forecasting it to be 60 degrees! Such weird weather for December and New York!

Since it is December and the holidays are approaching I bring you the first holiday manicure! Anyone can do this manicure it so simple you can't mess it up!

First up you start with a gold foil polish! I used Sally Hansen Golden-I which I just bought and can't believe I never owned it! Plus gold polishes are all over this time a year, there are a few companies that have them out this year. Two coats and your at optimal opaqueness. Let that dry completely, then add one to two coats of your favorite multi color glitter! Who doesn't want to be all sparkly this time of year??

I would suggest if your multicolored glitter is densely packed then only use one coat if its a very sparse glitter like the one I used which was the Blue Cross Beauty Holiday Lights use two coats. The bottle actually lights up different colors!

Add your favorite top coat and you are good to go! I got a lot of compliments at work on this manicure, it's so simple and festive that it would go good would any holiday party and outfit!

Check out the photos below!! I hope you enjoyed this post and stay tuned for more holiday manicures and treats!


Monday, November 19, 2012

China Glaze Cranberry Splash with a twist!

Hello lovelies!

It is the Tuesday before Thanksgiving and I'm still debating on doing some sort of Turkey day nails.

But anyway today I have a red polish for you that I can say I like way more then my favorite red from last year! Last year I was obsessed with Velvet Bow from China Glaze. It was from their Let It Snow collection and it is this amazing vampy red squishy polish! I don't normally wear reds because of my skin-tone but when I saw this red this year I had to have it!

This year China Glaze in their Holiday Joy Collection put out quite a few reds; actually almost half the collection is reds. Cranberry Splash was the one that stood out from the pack and spoke to me saying it wanted to join my stash! How exciting!!

So on a trip to Sally Beauty Supply I went to go and get the few polishes I wanted from the holiday collection and to see if the Cirque polishes were out yet. Out of all the polishes I went to search for Cranberry Splash was the only one who came home with me. There is more to this story but right now I don't want to bring it up since I'm waiting to hear back from Sally's.

Cranberry Splash is a glowy shimmery not frosty red. I can't tell if it leans more orange or blue it's somewhere in the middle, you know how sometimes you can tell. On the night that I bought it I was dying to try it out so I made my mom the test subject and painted her pinkie nail. For someone who hates my love of polish but yet will buy it for herself sometimes, my mom really liked this one! Hopefully I will be successful and get her to wear it for Christmas!

I was literally in love from the second I painted it on her nail! One coat actually seemed to be perfect! Although upon taking a picture of her nail you could see two coats would be best since there were some thin spots. Even though these thin spots were only visible in direct light.

For myself when I changed my polish on Friday I did the standard two coats and let it dry. Now this polish is super shiny without a top coat but you know I need the extra protection. To make it more glittery I had to add a new polish I just bought; I added Maybeline Color Show Sequins Ruby Rhinestones to my ring fingers. Ruby Rhinestones is a ruby glitter polish that is in a raspberry tinted base with small round red glitter, medium red hex glitter and surprisingly has tiny square black matte glitter too! When looking at it from the bottle you do not see the black glitter , I didn't even see it on my nail until I had my nail close to my face one night after I took my contacts out!

The wear time on this polish is good, I have had it on for three-four days now and it only has minor tip wear! I plan on buying a back up of this polish once Head2toe beauty comes back from there holiday break!

So take a look at the photos and tell me what you think!!! Until next time!


Sunday, November 11, 2012

Stop Flirting and Where's my Chauffeur???

Hello and happy Sunday!!

I apologize for not having a post for yesterday, my usual schedule of posting every other day has been going pretty well until Saturday morning when I went to put the post together. The polish I had swatched/wore was a beauty. It was one of the new Pure Ice Polishes that are exclusive to Walmart and limited edition. I won't go in to much detail about it since I plan on re-swatching it and posting it eventually. I thought the photos came out well but when I pulled them up on the computer they looked horrid. In the end I had to trash those pics and start from scratch.

So that's where today's manicure came from. It took me all day to decide what to put on Saturday and I decided I wanted some glitz but not all out in your face glitz.

I started out with my base coat of course. Besides using the matte top coat I also did a layer of Orly Bonder before hand because my nails were fraying a little and I always noticed Bonder seemed to help with that.

After my base was dried, I applied one of my newest untireds, Essie's Where's My Chauffeur?. This is from the Essie Winter Collection and you can find it wherever Essie Polishes are sold, it was the only one that stood out to me, the other colors are ones that either I have from a different brand or just not me.

Count 'em 3 coats to make WMC opaque. The formula is nice, easy to handle, the only thing I noticed was brush drag if I didn't let each coat dry completely. The color of this polish can be compared to China Glaze Aquadellic although I feel WMC is a little more dustier, which I think Jen from the Polishaholic has swatches up on her blog.


OK now for now for the glitz! In the new Pure Ice Polishes, there are two glitters I purchased that seem to resemble the OPI Muppet's Polishes. The one I added on for the sparkle is called Stop Flirting it is a blue glitter with larger silver hex glitter mixed it. I believe the OPI polish it resembles is Gone Gonzo. I don't own that polish so I cant do a side by side comparison.

Stop Flirting is actually a smooth glitter, I added three coats to my ring finger over WMC  and even with out top coat it was smooth. That is a huge plus in my book!


Okay so I hope you enjoyed this post! Stay tuned for the next one soon.
<3 Nicole

Thursday, September 20, 2012

China Glaze: I'm Not Lion

Hey guys! Hope you all are fabulous!!!

I have been doing well, some awesome things are happening in my life! My best friend Stephanie, who has been my BFF for the last 7 years just had her first baby! Gianna Nicole, yes Stephanie was awesome and gave her daughter my name as her middle name! I was so excited when she told me she was pregnant! This was the first time I have had anyone close to me have a kid so I couldn't wait to be involved! Since Steph and I are like sisters I got to go to one of the sonograms and see baby Gianna, and I got to help with the baby shower! When Gianna was born I got to go the day after and see her and I got to hold her! Holding a one day old baby is amazing she so tiny and squishy! I can't wait to see her grow up and learn to talk and call me aunt pumpernickel (yeah that's my nickname)!

The other awesome thing happening in my life right now is that I am about to make my final credit card debt payment this week! Its taken me about a year to pay it off! Don't get me wrong I make sure all bills that need to be paid are paid first before I go out and buy anything such as clothing, make up or nail polish.


So anyway after sharing that awesome news with you guys, its time to show you my manicure! I finally decided to wear a glitter polish I bought back on my birthday in July. Today I have China Glaze's I'm not Lion!

This is a pale gold glitter that is finely milled and packed with some holographic bits as well! It is so pretty in the bottle and on the nail! You can wear this polish on its own like I am in this post or you can layer it over black or any dark color to make it pop!

Two coats is more than enough for opacity alone, it does dry very gritty. It's the one thing I hate most about glitter polishes and the fact they eat top costs like crazy! I love when a glitter dries smooth they are few and far between but they'd do exist!

OK so on to the pictures!


The first picture is with a flash and no top coat. The second picture is no flash with two coats of top coat (Sally Hansen Insta Dry) and the last picture is a blurry shot to see the sparkly-ness of I'm Not Lion.

I'm Not Lion is one of the glitters from the On Safari Collection from China Glaze and should still be available online through places like Head2Toe Beauty, Transdesign, and Victoria Nail Supply. Prices may vary by E-tailer. I purchased my polish at Sally's Beauty Supply when they had the collection.

Okay so I hoped you enjoyed that and I will have a new post soon! I have an idea in the works but it's not properly thought out yet :)

OK talk to you all soon :)

Saturday, August 11, 2012

Glitter Jelly Sandwich time! Glitter Jelly Sandwich time..

Like the title? Yeah me trying to be clever....Anywho, Hello!!!

Hope you all are having a good Saturday, its still raining here in good ole New York. Lucky me had to walk through a tremendous downpour just to get from my car to my front door... which has no awning or gutters so its like walking through a waterfall. Needless to say I got an unneeded second shower today!

Today I bring you another bright happy manicure. A jelly sandwich! Jelly sandwiches are so easy to do! You take a jelly polish, put on one to two layers of it, let it dry, add one coat of your favorite multi colored glitter polish or just some sort of glitter polish in general and then add one more thin coat of your jelly polish and TA DA you have a jelly sandwich.

Now you could save your self some time and buy the polishes that already have all the ingredients together and all you have to do is apply two to three coats of it. I personally wish I had more of those types. I don't own many jelly polishes myself in fact I think I only own one or two. Oh and if your curious as to what a jelly polish is, it is a polish that you can still see through/ or  see your visible nail line even after three coats.

Today's jelly sandwich consist of two coats of Sinful Colors Scandal. Now I bought Scandal way before all the Sinful Colors Hullabaloo. Now while I don't support what they did in any sense, it was just down right wrong, I'm still going to use the polishes I have... Since I'm on that no buy....

After I applied Scandal's first two coats and let dry, I then applied one coat of Confetti Polish in Tasmanian Devil. This polish is a good dupe for all those other rainbow glitter polishes out there and its fairly cheap too. I got mine from CVS but I don't remember how much it was, check with your local retailer to get the exact price for your area.

Once Tasmanian Devil was dry I applied one more thin coat over top to give the 'suspended' look. If I may say that it came out nicely.

 This first picture was taken with the flash on my camera, it only happened because the sun that peeked out right when I was ready to take pictures dashed away behind the clouds. :(

This is by far my favorite picture of the three in this post. It's in the natural cloudy light and it definitely shows the glitter suspended in the polish well. Plus the glitter is nicely defined in this picture too, you can see some of the individual colors.


Lastly this picture was taken under artificial light, a huge thanks to the overhead light of the stove for participating!

Okay so I hope you enjoyed this post and I believe by Monday this mani will be history, I'm assuming its going to peel off just like my last two did... grr.. don't even get me started on it. But by Monday I think the next sprinkles polish is in line to be posted!

Talk to you all then!
Nicole

Wednesday, July 25, 2012

Nails Inc. Sprinkles Topping Lane.

Good afternoon!

Hope you all are well! Today I bring to you the second of the Nails Inc. Sprinkles Collection, Topping Lane!

Topping Lane is a pink jelly base that personally I would like to see Nails Inc put out on its own; that is filled with small round silver, fusica and purple glitter. I know Nails Inc. says its a different color but to my eyes it's a deep purple which I like a lot!

Once again two coats is the perfect amount to achieve opacity. I definitely feel like I have dipped my hands in pink frosting and then matching sprinkles. Speaking of sprinkles this polish also matches the sprinkles and candy coating I bought for the cake bites I will be making next week for my sister/BFF's baby shower. Maybe this will be my baby showers manicure.

Ok before I get to pictures I wanted to let you guys know I will be do a nine week summer nail art challenge! I will be doing it alongside Adri from Moriesnailart, and Lindsey from Polish and Diamond! I think I will do a separate post tomorrow to give you all the details!

Ok now for pictures! All picture are two coats with top coat in natural sunlight!

Hope you enjoy!

Tuesday, July 24, 2012

Nails Inc. Sprinkles: Sugar House Lane.

Hello!

Today I have one of four polishes I was super excited to get my hands on. I finally placed a much needed first ever online Sephora order.

I have only been to Sephora on a couple of occasions but never bought much. Sephora is slightly out of my price range. But after hearing a lot about the Sprinkles collection from Nails Inc. I knew I had to get them!.

I had a little bit left on a gift card from Christmas so I figured I would use that and get two of them. But Sephora sucks you in by teasing you. How? Well once you add a product to your cart a little note pops up saying if you spend x amount of dollars more you qualify for free shipping! The minimum purchase for free standard shipping is $50. So I got sucked in and bought the rest of the collection and a Soap and Glory shower gel.

I can complain though I'm enjoying every bit of what I ordered plus the samples!

So here it is Sugar House Lane. Its not my favorite of the four but I like it for work. It definitely came in handy yesterday when our specialist from corporate was around.

The polish is a beige jelly base that I can tell wants to mimic milk chocolate frosting with sprinkles like the little cupcake picture on the bottle. The glitter is small and round, colored black and silver that does look white in some instances.

The formula is amazing! Two costs and I'm good to go! You do need more than one coat of top coat to even it out. The pictures below show Sugar House Lane in natural sunlight and the last one is with a flash.


Until next time! 


Sunday, May 20, 2012

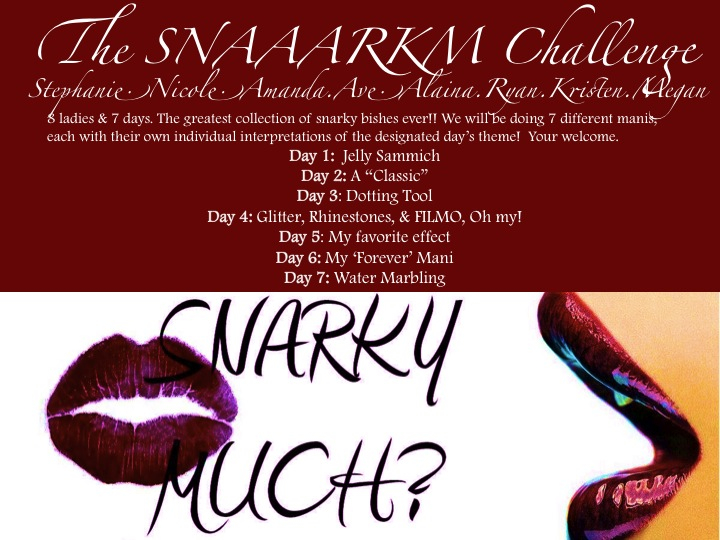
SNAAARKM Challenge Day 4: Glitter, Rhinestones, and FIMO! Oh my!

Happy Sunday!

Today marks Day 4 of the SNAAARKM Challenge! To remind you of what is yet to come!


Click on me to make me bigger if you can't read it!


Today is Glitter, Rhinestones, and FIMO! Oh my! I chose glitter for today since I don't have the other too! With my job even putting a nail sticker on isn't worth it. I had two on this past weekend on my thumbs and they came off by the time my shift was over. I also had put a top coat over them to seal them in! I don't feel right investing in something that's not going to last long. :(

Anyway on to the glitter portion of the challenge! I love glitter polishes! As much as a pain in the you know what to take off, ( unless you use the foil method) I love the way the sparkle in the sun!


The glitter I chose for this was one of the new Wet 'n' Wild Color Icon Glitters. I don't remember the name of the collection I think its Bejeweled. They all have royal sounding names though.

The one I used is called Speak When Spoken To. I also own Bow In My Presence. These are color shifting glitters, similar to the China Glaze Prismatic.

I layered about three coats over Funky Fingers Sugar Plum Fairy. I really wanted to capture the color shift and got some of it but I didn't get the best sun since it was going down when I went outside to take pictures.


Its primarily a blue toned glitter and then shifts to a pink/purple in the light. It super pretty on the nail in real life in the sun. The first picture I was trying to get the pink to show through and due to my poor timing of lighting I only got the blue side. I wonder though if the choice of base has anything to do with it.

So that is it for my glitter challenge day! I hope you enjoyed it. I'll try to do a swatch by itself of the nail soon with Bow In My Presence.

Meanwhile, check out my other girls who are doing this fantastic challenge!
Don't forget to follow all of us on Twitter!

The Little Canvas                        Dream A Little Dream Of Polish

                           Sincerely Stephanie                                Fashion Footing

Let There Be Lacquer                                            Polish Pixelle                 In The Name Of Polish


Monday, May 14, 2012

Let the 7 Day Challenge Begin! Day One: Jelly Sammich!

Hello!

Today I bring you the start of the 7 Day Challenge!


So this challenge consist of 8 lovely ladies and 7 days of challenges ranging from today's challenge of Jelly Sammich to Water Marbling! As it goes we shall be posting every other day and at 6p.m. Since most of us are on EST that's how we came up with the time.

So on to today's challenge. Jelly Sammich. A jelly sammich consist of using a nail polish that is sheer and has a jelly like finish that you can layer glitter in between coats of polish. In this challenge each lady will be able to interpret the challenge in there own way!

Here is my take on the Jelly Sammich. Since none of my polishes have that jelly like finish except for one and I didn't care for it much I found some sheer creme polishes that did the job just fine. To help me out it did put down a layer of white first and then a coat of color to help combat streaky-ness. Streaky polish is my enemy!

I used Simply Sweet Polish in baby pink which I bought at Marshall's before Easter. Then layered one coat of Spoiled Trust Fund Baby. Trust Fund Baby has gold, blue, magenta and black square and round glitter and is perfect for sammiches.


As you can see I missed a small spot on my middle finger. :( oh well. now that I'm down to three nubs I tried to shorten all as best I could except for my pinkies there the only finger nail that grows fast and strong.

I think I will wear this manicure more often with a different color. This makes me want cupcakes with pink frosting and sprinkles now. Also I must go hunt down some jelly polishes as well too.

I hoped you like this post and if you did go and visit the 7 other fabulous ladies who are doing this challenge.

Alaina - The Little Canvas
Stephanie - Sincerely Stephanie
Ryan - Dream A Little Dream Of Polish
Ave- Polish Pixelle
Amanda- Fashion Footing
Kristen- In The Name Of Polish
Megan- Let There Be Lacquer.


Until then.
Nicole.